14 DIY Garden Projects to Upgrade Your Yard
Ahh, there’s something magical about stepping into a garden that feels like an extension of your home—where creativity meets nature, and every plant or decoration tells a story. Whether you have a balcony, backyard, or even a small apartment window, the beauty of DIY garden projects is that they can turn any space into a blooming oasis.
Today, I’m sharing some DIY garden projects that will have you grabbing your tools, a cup of coffee, and transforming your outdoor space into something you’ll be proud of. Get ready to roll up your sleeves, because we’re diving into a world of creativity where even the smallest plants can make a big impact.
- Outdoor tools (shovel, rake, pruning shears)
- Planter boxes (or materials to build your own)
- Wood, pallets, or bricks (for raised beds)
- Paint or stain (for wood projects)
- Potting soil and plants
- String lights or lanterns (for a cozy vibe)
- Craft supplies (twine, fabric, paint)
- Outdoor furniture materials (wood, cushions, paint)
1. DIY Garden Planter Boxes: Perfect for Small Spaces
So, you don’t have a lot of outdoor space but want to grow your own veggies, herbs, or flowers? A DIY garden planter box might be your new best friend. Not only do they add a charming touch to your garden, but they’re also easy to build (even for beginners!). Plus, you can customize them to fit your space perfectly.
Steps to Create Your Own Planter Box:
- Gather Materials: You’ll need some wood (old pallets are a great option!), screws, and a drill.
- Cut the Wood: Measure and cut your pieces to create the four sides of the box.
- Assemble the Box: Screw the pieces together. If you’re working with pallets, you can skip this step and just use the pallets as the base!
- Line the Box: For drainage, line the bottom with landscape fabric or a similar material.
- Fill with Soil: Add some potting soil and your favorite plants.
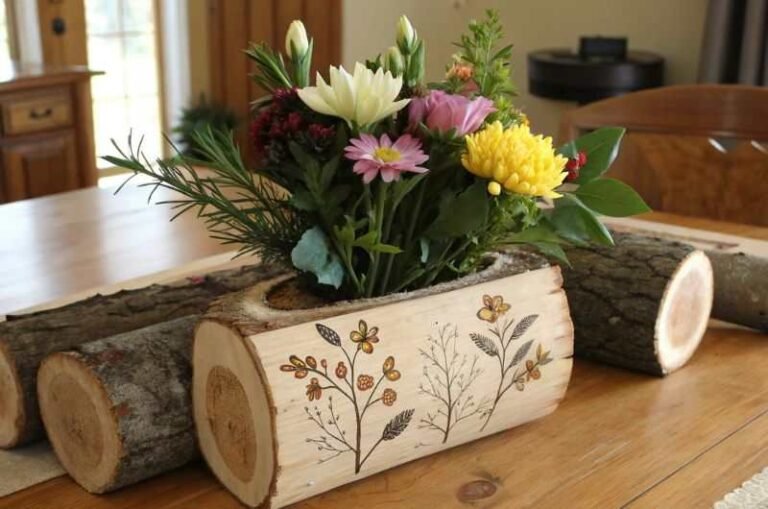
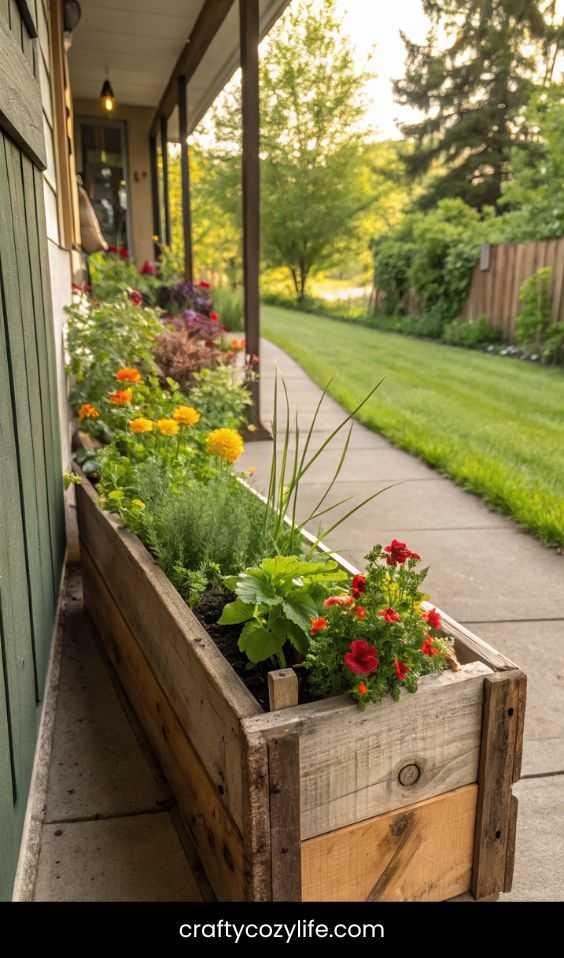
Picture This: Imagine your backyard with a rustic wooden planter box sitting on your porch or next to your garden path, filled with vibrant flowers or fresh herbs. The wooden surface is slightly weathered from the sun, and the plants are starting to grow tall, creating a cozy and inviting feel.
2. Whimsical Garden Stepping Stones: Add a Personal Touch
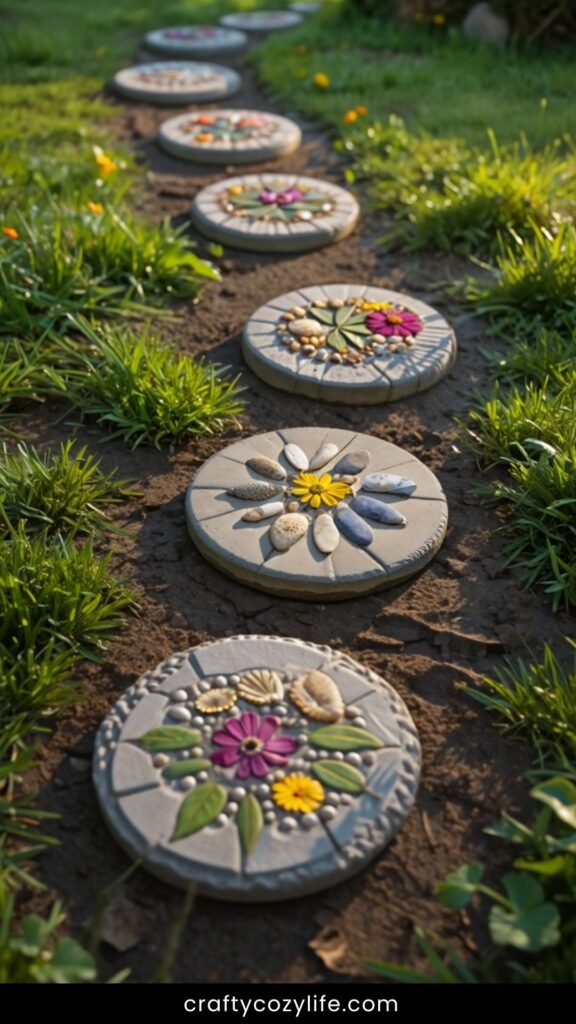
Nothing says “I’m a DIY garden queen” like a set of personalized stepping stones. These simple but charming additions can guide the way through your garden while adding a dash of fun. You can make them as artistic or simple as you like!
Steps to Create Your Own Stepping Stones:
- Mix the Concrete: Use a premixed concrete bag. Follow the instructions on the package, but make sure it’s thick enough to hold your mold.
- Prepare the Mold: You can use a plastic container, a silicone baking mold, or even an old cake pan for the shape.
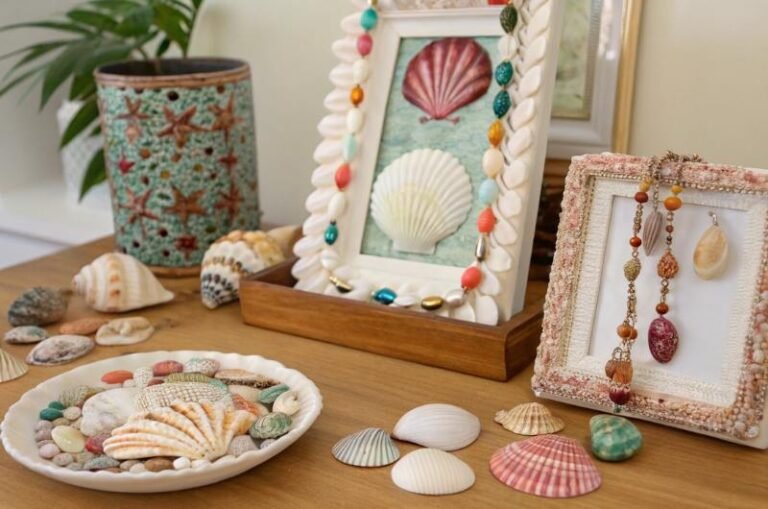
- Decorate the Stone: Once the concrete is poured, get creative! Press in some stones, shells, or even glass beads to give each stepping stone a unique touch.
- Let it Dry: Give it at least 24 hours to dry completely before using it in your garden.
Picture This: Picture yourself strolling through your garden, the stones beneath your feet each telling a little story. Some are dotted with colorful stones, others have handprints or little trinkets embedded. The garden feels like your personal treasure map.
3. DIY Vertical Garden: Maximize Your Space
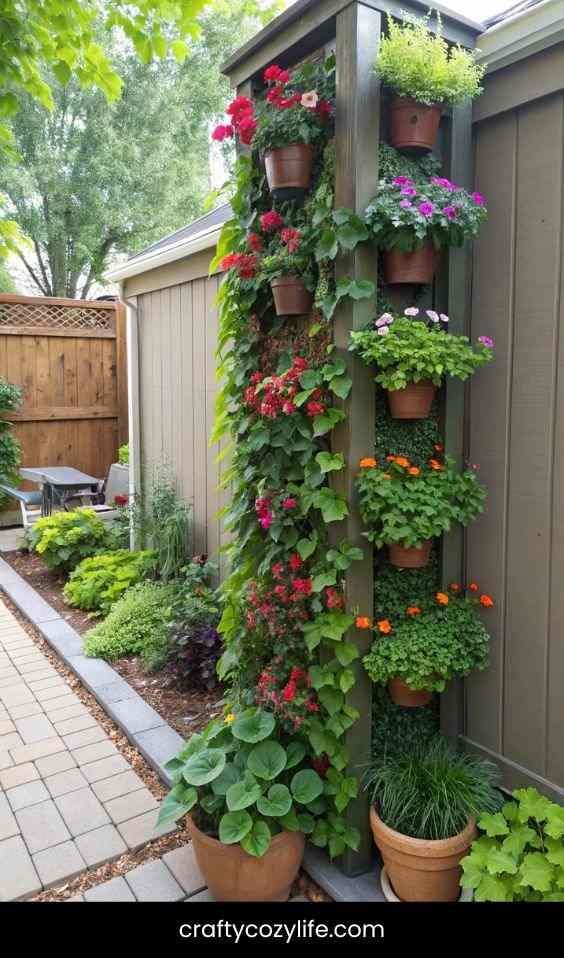
If your garden is on the smaller side (or if you just want to add a little more greenery without taking up too much ground space), a vertical garden could be your solution. It’s simple, space-saving, and can add a whole new dimension to your outdoor space.
Steps to Create a Vertical Garden:
- Choose Your Frame: You can use an old ladder, a wooden pallet, or even create a simple frame using stakes and chicken wire.
- Add Containers: Attach small pots or containers to the frame. You can even use upcycled items like mason jars or tin cans for a rustic touch.
- Plant Your Favorites: Choose plants that will thrive in a vertical garden, like trailing vines, succulents, or small flowers.
- Watering: Keep in mind that vertical gardens can dry out quicker, so be sure to water regularly.
Picture This: Imagine a vertical garden standing proudly in your backyard, bursting with greenery. Each little pot overflows with beautiful flowers or creeping vines, and the entire structure creates a dynamic backdrop to your garden space.
4. DIY Outdoor Garden Bench: A Cozy Place to Rest
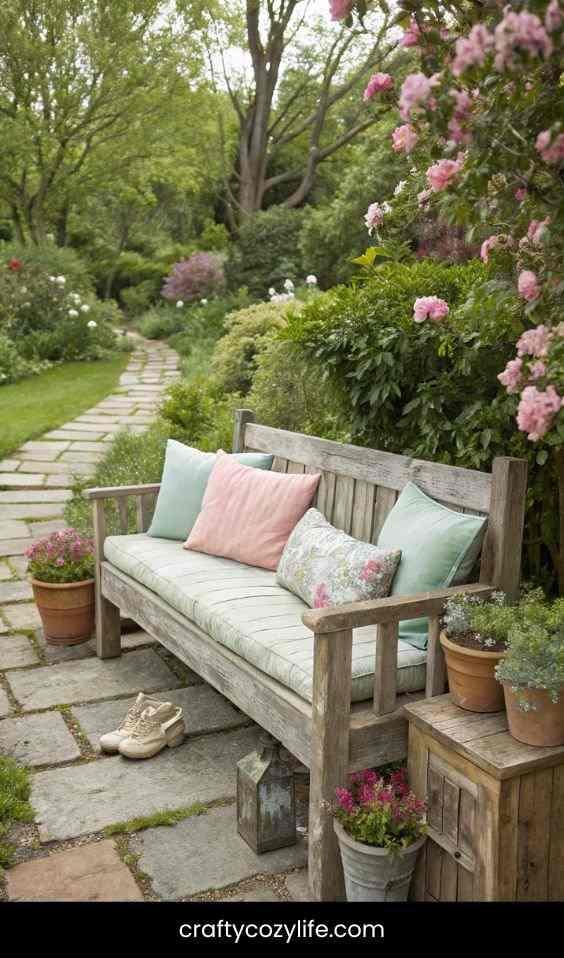
Sometimes, it’s all about the little details that make your garden feel like a sanctuary. A DIY garden bench is the perfect place to sit, relax, and take in all the beauty you’ve created. Plus, it’s a fun and simple project!
Steps to Build Your Own Garden Bench:
- Choose Your Wood: You’ll need sturdy wood for the seat and legs. Pallets, 2x4s, or reclaimed wood are perfect for this.
- Measure & Cut: Measure the length of the seat (typically around 4 feet) and cut your pieces to size.
- Assemble the Frame: Build the frame first, attaching the legs to the underside of the seat.
- Add the Seat Slats: Place the slats across the frame, securing them with screws.
- Finish It: Sand the edges for a smooth finish, then paint or stain for durability.
Picture This: Picture yourself sitting on your new outdoor bench, the soft sunlight filtering through the leaves, sipping your coffee while watching the birds flutter around. Your garden feels more like a cozy retreat than ever before.
5. DIY Garden Lanterns: Light Up the Night
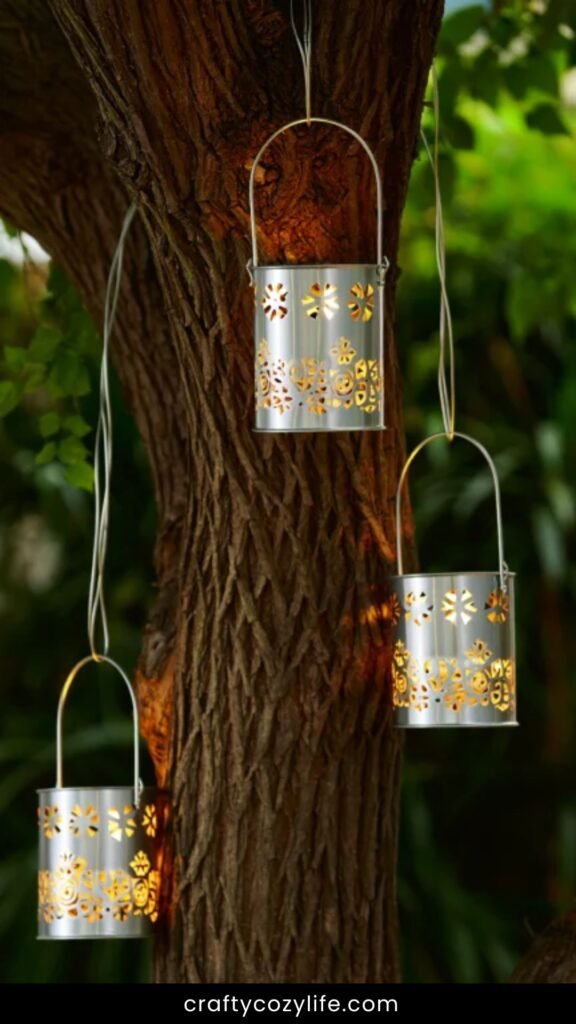
Want to add a little magic to your garden after the sun goes down? DIY garden lanterns are a perfect way to create a cozy ambiance, and they’re easier to make than you might think.
Steps to Create Your Own Lanterns:
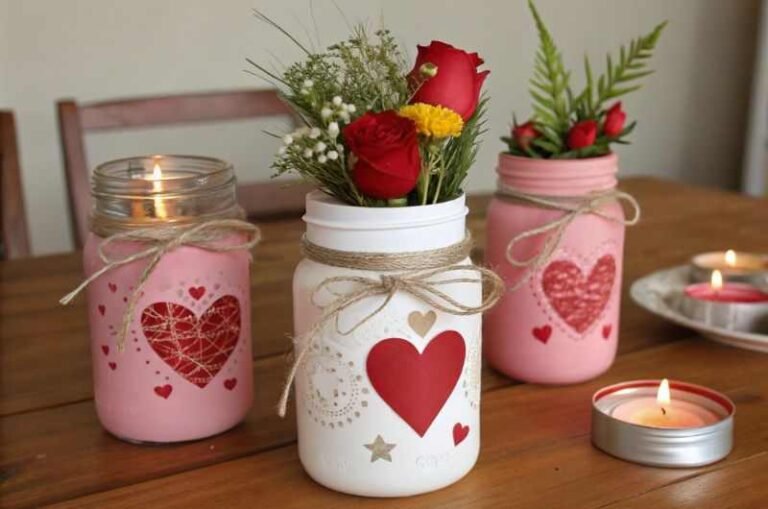
- Pick Your Lantern Base: You can use mason jars, tin cans, or even old glass bottles.
- Decorate the Lantern: Paint the outside, or add a decorative touch like twine or lace. You can also place decorative stones or glitter inside.
- Add a Light: Insert a candle or LED light inside the lantern.
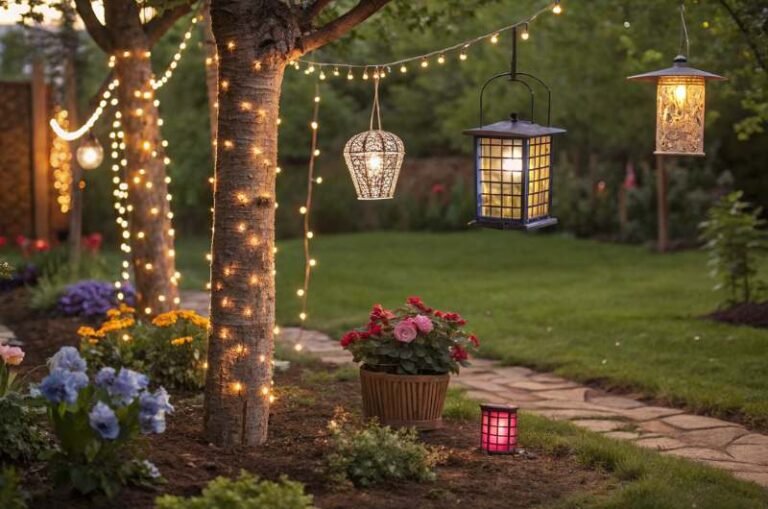
- Hang or Place: Place your lanterns along your garden path or hang them from tree branches for a magical effect.
Picture This: Envision your garden lit up with soft, glowing lanterns swaying gently in the evening breeze. The warm light casts a beautiful glow over your flowers and plants, creating a peaceful, enchanting atmosphere.
6. DIY Herb Spiral: A Space-Saving Garden Feature
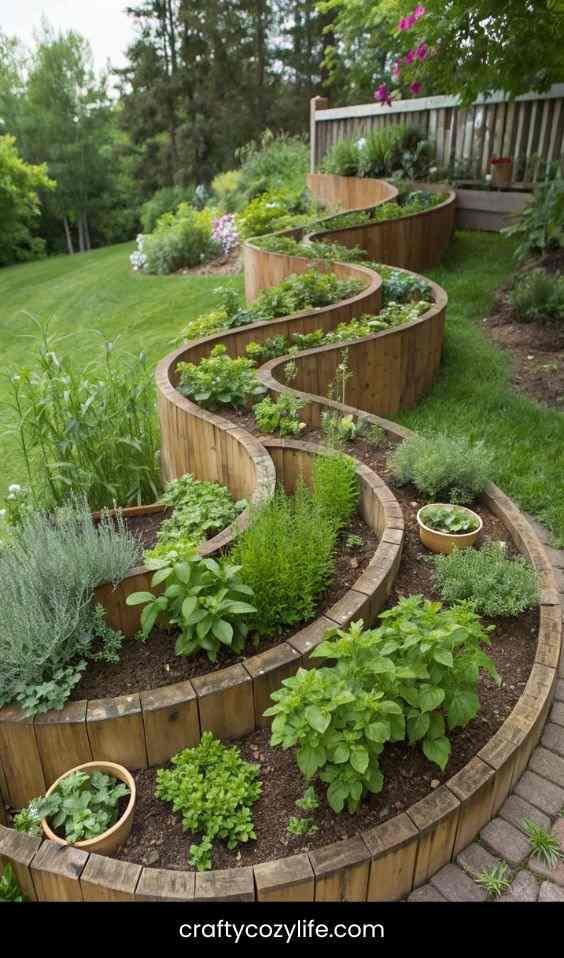
An herb spiral is a fantastic way to maximize space and create a visually interesting feature in your garden. It’s perfect for growing herbs of all kinds in a small area.
Steps to Create an Herb Spiral:
- Mark the Spiral: Choose your location and use string to mark the shape of the spiral.
- Gather Stones or Bricks: These will form the structure of your spiral.
- Build the Spiral: Start stacking the stones or bricks in a spiral shape, with the tallest point in the center.
- Fill with Soil: Add soil to each section, keeping it lower at the top and higher at the bottom to mimic a natural environment.
- Plant Your Herbs: Fill each section of the spiral with herbs like basil, thyme, rosemary, and mint.
Picture This: Picture a beautiful spiral winding up in your garden, each turn filled with a different herb, growing lush and aromatic. The spiral makes a statement and brings a fresh, herbal fragrance to your space.
7. DIY Garden Trellis: Support for Climbing Plants
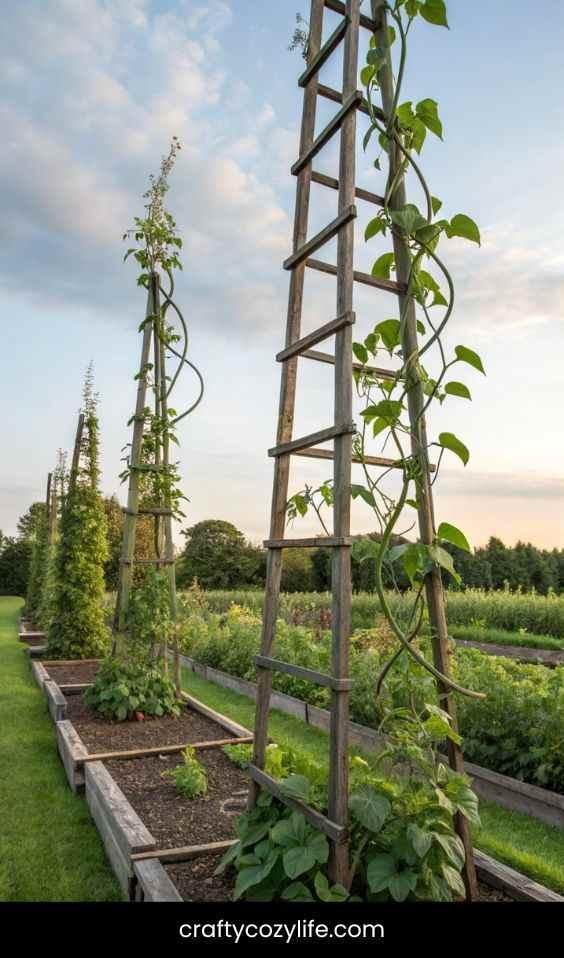
A trellis can add height and structure to your garden while providing support for climbing plants like tomatoes, peas, or morning glories.
Steps to Build Your Own Trellis:
- Choose Your Material: Use wood, bamboo poles, or wire mesh.
- Cut the Material: For a simple A-frame trellis, cut your wood or poles to the desired length.
- Assemble the Frame: Create a sturdy frame by attaching the pieces together at the top.
- Attach the Mesh or Strings: If you’re using wire or string, attach it vertically between the two frames.
- Plant Your Climbers: Train your climbing plants to grow up the trellis.
Picture This: Imagine your plants creeping up the trellis, their leaves twirling around the vertical supports. The trellis stands tall in your garden, adding both function and flair.
8. Upcycled Garden Furniture: Reuse and Revamp
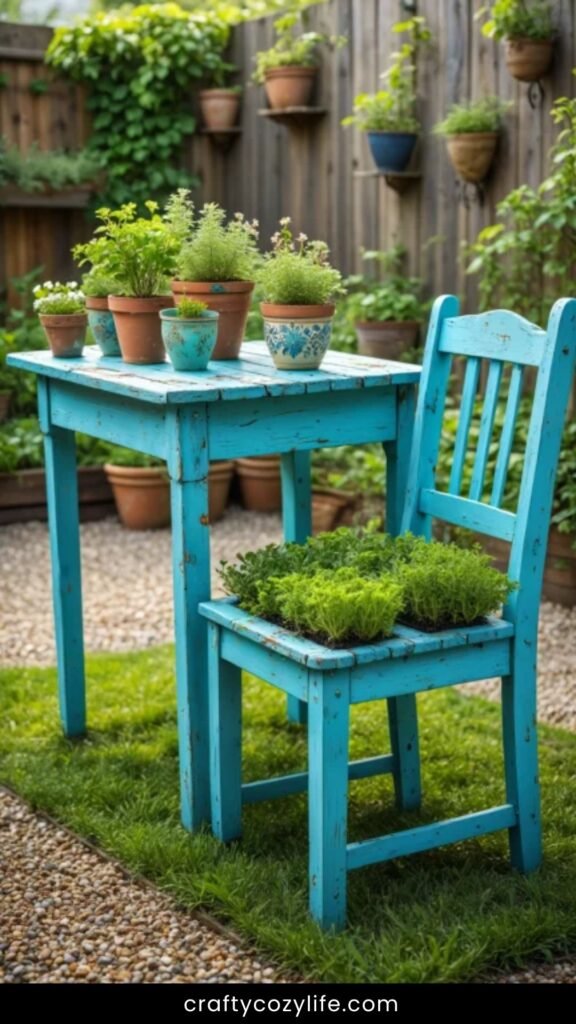
Why not turn an old piece of furniture into something new and fabulous for your garden? An upcycled table or chair can become a rustic gem for your outdoor space.
Steps to Create Upcycled Garden Furniture:
- Find Old Furniture: Look for items you no longer use, like a worn-out chair or a small table.
- Sand and Paint: Sand it down and give it a fresh coat of outdoor-friendly paint.
- Add Cushions: Place weather-resistant cushions on the chairs for comfort.
- Decorate: Add outdoor pillows or even use stencils to add a little extra design.
Picture This: Picture an old chair painted in a fun pastel color, sitting in the sun with a cozy cushion. You sip lemonade while you sit back and relax in your newly revamped garden lounge.
9. DIY Compost Bin: Turn Waste into Rich Soil
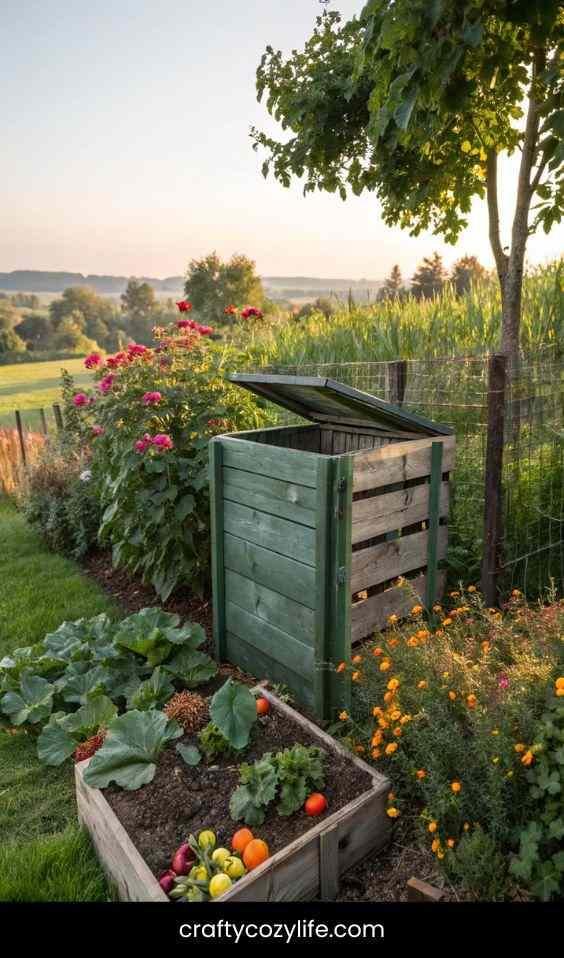
If you’re into sustainability, creating your own compost bin is a fantastic DIY project. Not only does it reduce waste, but it also gives you nutrient-rich soil for your garden.
Steps to Build a Compost Bin:
- Choose a Location: Find a dry, shaded spot in your garden.
- Create a Frame: Use pallets or chicken wire to form the sides of the bin.
- Layer Your Compost: Start with coarse materials like twigs and leaves, then add kitchen scraps, grass clippings, and coffee grounds.
- Turn the Pile: Turn the compost regularly to help it break down faster.
Picture This: Imagine your compost bin quietly working in the corner of your garden, providing a rich, dark soil that’ll help your flowers and veggies grow better than ever.
10. DIY Water Fountain: Add Peaceful Sound to Your Garden

A DIY water fountain is a great way to add a calming ambiance to your garden. It’s easy to make and offers a soothing sound that transforms the atmosphere.
Steps to Create Your Own Fountain:
- Choose Your Container: Use a large pot, barrel, or even a large bowl for the base.
- Add a Pump: Install a small submersible pump at the bottom of the container.
- Arrange the Rocks: Place decorative rocks or stones around the pump to hide it.
- Fill with Water: Add water to the container, ensuring the pump is submerged.
Picture This: Picture the soft trickle of water as it flows gently from the fountain, adding a peaceful, serene atmosphere to your garden space. It’s the perfect soundtrack for a warm evening.
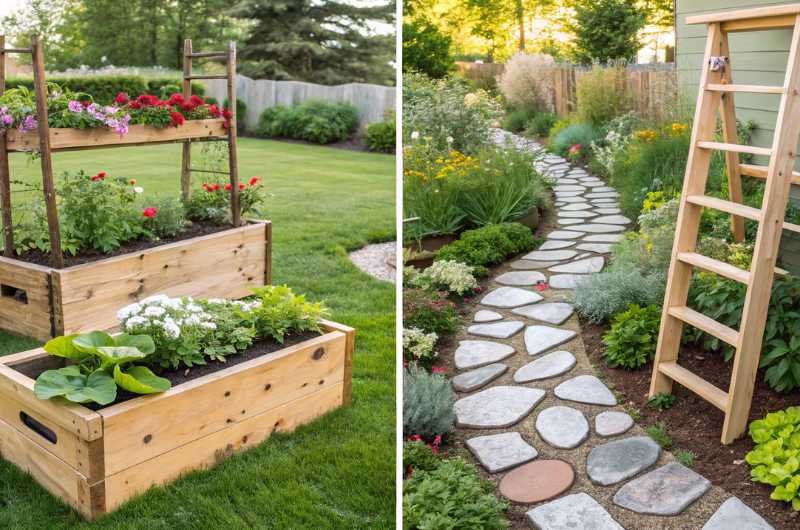
11. DIY Garden Path: A Charming Walkway
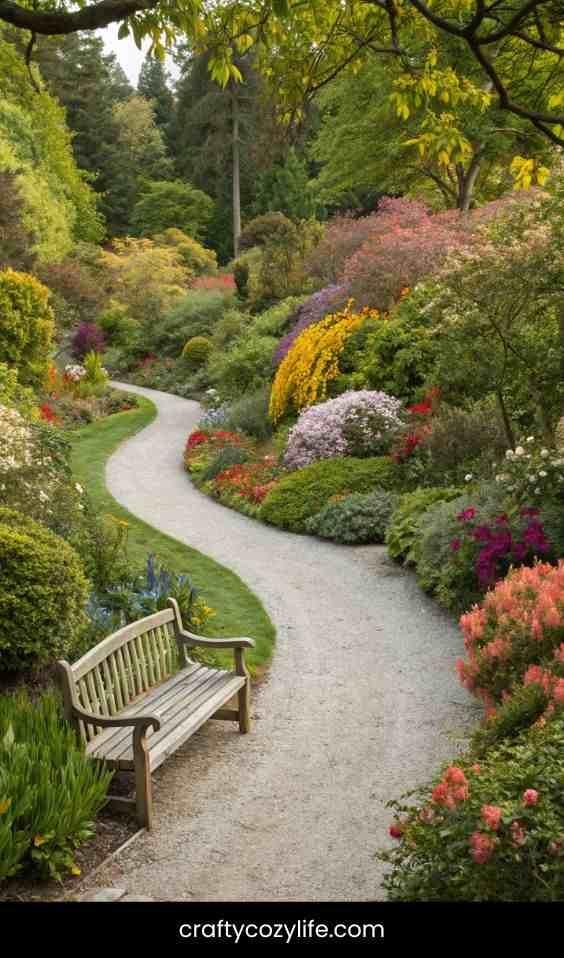
A garden path can guide you through your garden while adding beauty and structure. Whether it’s made of stones, gravel, or bricks, it’ll make your garden feel even more magical.
Steps to Create Your Own Garden Path:
- Choose Your Path Material: Use stones, bricks, or gravel.
- Measure and Plan: Lay out your path with string or chalk to guide you.
- Prep the Ground: Dig a small trench for your path to sit in.
- Lay the Materials: Arrange the stones or bricks in a pattern that you love.
- Fill Gaps: Fill any gaps with gravel or sand to secure everything.
Picture This: Picture yourself walking down the winding garden path, the soft crunch of gravel beneath your feet. Each turn reveals something new—colorful flowers, shrubs, or even a cozy bench.
12. DIY Garden Arch: Create an Elegant Entryway
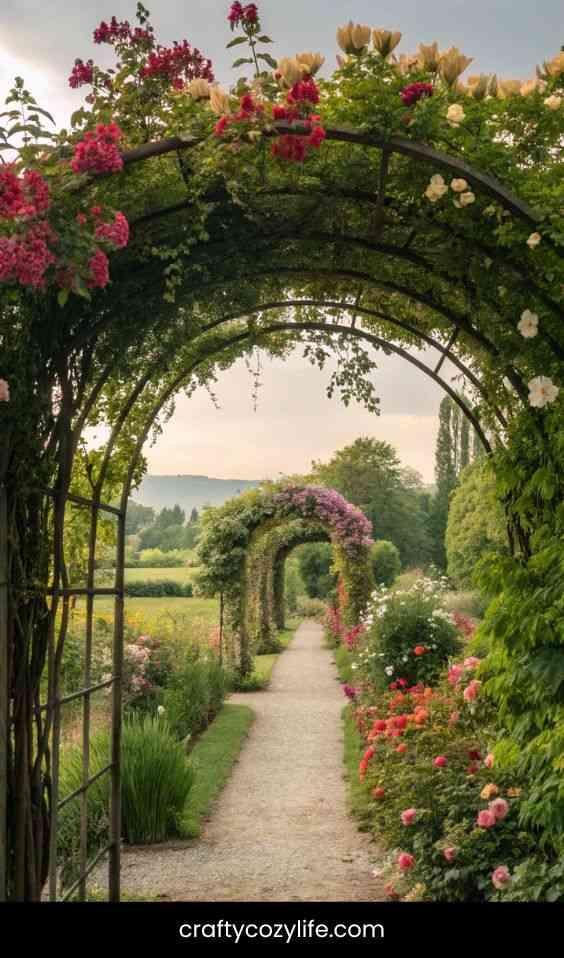
An arch in your garden adds a touch of elegance and charm, creating a beautiful entrance to your outdoor space.
Steps to Build a Garden Arch:
- Choose the Material: You can use wood, bamboo, or metal for your frame.
- Build the Frame: Cut the material to create the shape of an arch.
- Secure the Arch: Sink the sides into the ground or attach them to sturdy posts.
- Add Plants: Train climbing plants like roses or ivy to grow over the arch.
Picture This: Imagine walking through the arch, greeted by blooming flowers or lush vines hanging down. It’s a beautiful entrance to your private garden escape.
13. DIY Garden Shed: Organize Your Tools in Style
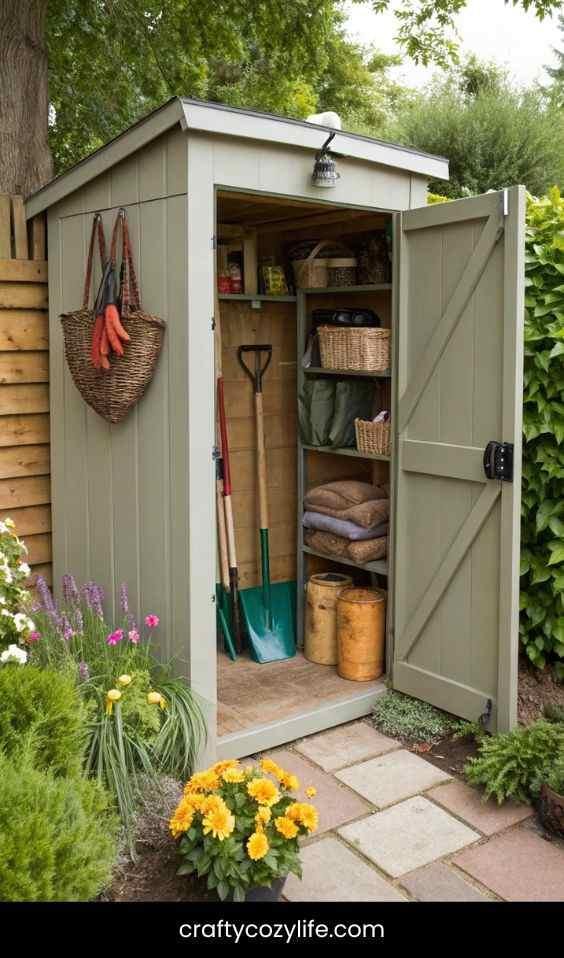
A garden shed is a functional and charming addition to any garden. It keeps your tools organized and offers a cozy space to store your gardening supplies.
Steps to Build a Garden Shed:
- Choose the Location: Pick a flat, accessible area in your garden.
- Gather Materials: You’ll need wood, nails, a hammer, and roofing material.
- Build the Frame: Start by building the frame and the floor.
- Add Walls and Roof: Attach the walls and roof, leaving space for windows or a door.
- Organize Inside: Use shelves or hooks to keep tools neat.
Picture This: Picture a little shed tucked away in the corner of your garden, the perfect space to store your gardening tools, bags of soil, and your gardening gloves, all organized and ready to go.
14. DIY Garden Sign: Add a Personal Touch
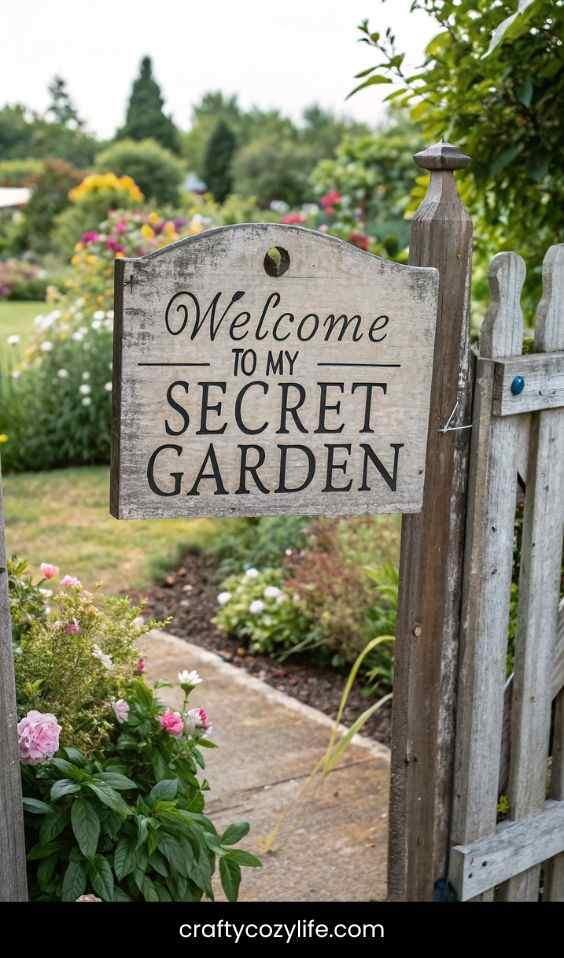
A garden sign adds character to your outdoor space and helps give it a personalized touch.
Steps to Create a Garden Sign:
- Choose Your Material: Use wood, stone, or even an old piece of furniture.
- Carve or Paint the Sign: Write a name, quote, or saying that fits your garden’s vibe.
- Attach It: Position the sign in a prominent place like by the entrance or near your favorite plants.
Picture This: Imagine a quaint wooden sign with “Welcome to My Secret Garden” carved into it, sitting proudly at the entrance to your backyard. It adds a personal, welcoming touch to your outdoor oasis.
Frequently Asked Questions (FAQs)
1. What are the easiest DIY garden projects for beginners?
If you’re just starting out, there are a few easy projects to dive into:
- DIY Garden Planter Boxes: These are simple to build and can be customized to any size.
- Stepping Stones: Personalizing stepping stones with decorative touches is a fun and easy craft.
- Upcycled Garden Furniture: Revamping old furniture is a beginner-friendly way to add charm to your space.
These projects require minimal tools and materials, making them perfect for new gardeners looking to dip their toes into DIY.
2. How do I know what plants to choose for my garden projects?
Choosing the right plants depends on your climate, garden space, and sunlight. Here are some tips:
- Research Your Climate Zone: Check your USDA hardiness zone to know which plants will thrive in your area.
- Consider Sunlight: If your garden gets full sun, opt for sun-loving plants like lavender or sunflowers. For shaded areas, try hostas or ferns.
- Go for Easy-to-Grow Plants: If you’re a beginner, start with low-maintenance plants like marigolds, daisies, or herbs like basil and mint.
3. What tools do I need for DIY garden projects?
The basics you’ll need for most garden projects are:
- Shovel and spade for digging.
- Rake for leveling soil and leaves.
- Hammer and screws/nails for building structures.
- Pruning Shears for trimming plants.
- Paintbrushes for decorating garden furniture or planters.
- Measuring Tape to ensure accuracy for building projects.
Don’t worry, many of these tools can be found at your local hardware store or even borrowed from friends!
4. How long do DIY garden projects typically take?
The time required depends on the complexity of your project:
- Simple Projects like planters, stepping stones, or decorative signs might take a few hours.
- Larger Projects like building a raised garden bed, garden trellis, or water fountain could take a weekend or more.
- Growing Plants: While you can plant them in one go, keep in mind that some plants may take time to grow and mature.
- Patience is key in the garden—both with the building projects and with the plants!
5. Can I do DIY garden projects without a lot of space?
Absolutely! Many DIY garden projects are perfect for small spaces:
- Vertical Gardens are great for maximizing space by growing plants upwards.
- Hanging Planters or Wall Planters allow you to grow plants without taking up precious ground space.
- Window Boxes are ideal for small balconies or patios.
Even if you only have a small balcony or corner of your yard, you can still enjoy the DIY garden experience!
Closing Thoughts
As you embark on these DIY garden projects, remember that gardening is as much about the journey as it is about the destination. Whether you’re planting your first raised bed, building a charming trellis, or simply adding a personal touch with upcycled furniture, each step brings you closer to a space that reflects your personality and creativity.
These projects allow you to connect with nature, get your hands a little dirty, and watch your garden grow in ways you never thought possible. Don’t stress if things don’t turn out perfect right away—gardens evolve over time, just like your skills.
So grab your tools, gather some materials, and get started. The beauty of a DIY garden is that it’s yours to shape and enjoy. And who knows? Your next favorite project could be just around the corner.
Happy gardening, and let your creativity bloom!