15 DIY Pantry Cabinet to Maximize Kitchen Storage
Ever feel like your kitchen is overflowing with bags of flour, random spice jars, and snacks that somehow vanish into the abyss? If you’re nodding along, then it’s time for a DIY pantry cabinet makeover!
Imagine having a stunning, organized pantry cabinet that makes your kitchen feel like a Pinterest dream. The best part? You can build it yourself! Grab your coffee, roll up your sleeves, and let’s dive into this fun, step-by-step project.
- Plywood or MDF board
- Wood screws
- Measuring tape
- Saw (circular or table saw)
- Wood glue
- Sandpaper
- Hinges
- Paint or stain
- Handles or knobs
- Drill
- Level
- Shelf brackets (optional)
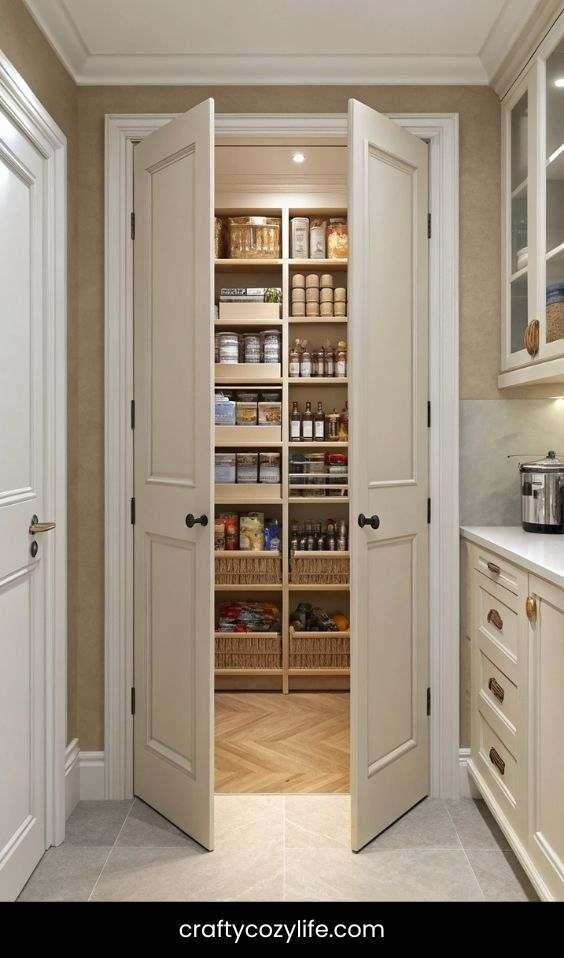
1. Plan Your DIY Pantry Cabinet Design

Before you even pick up a saw, let’s talk design. Think about your space—how big does your pantry need to be? Do you want open shelves, doors, or even pull-out drawers? Sketch out a simple plan, or use online design tools to visualize it.
Steps:
- Measure the space where your pantry will go.
- Decide on the height, width, and depth of your cabinet.
- Sketch a simple blueprint with dimensions.
- Determine how many shelves you’ll need and their spacing.
Picture This: A sleek DIY pantry cabinet, custom-fit to your kitchen, standing tall and proud. Every shelf is perfectly spaced, giving your favorite ingredients a stylish, easy-to-access home.
2. Cut and Prepare Your Wood
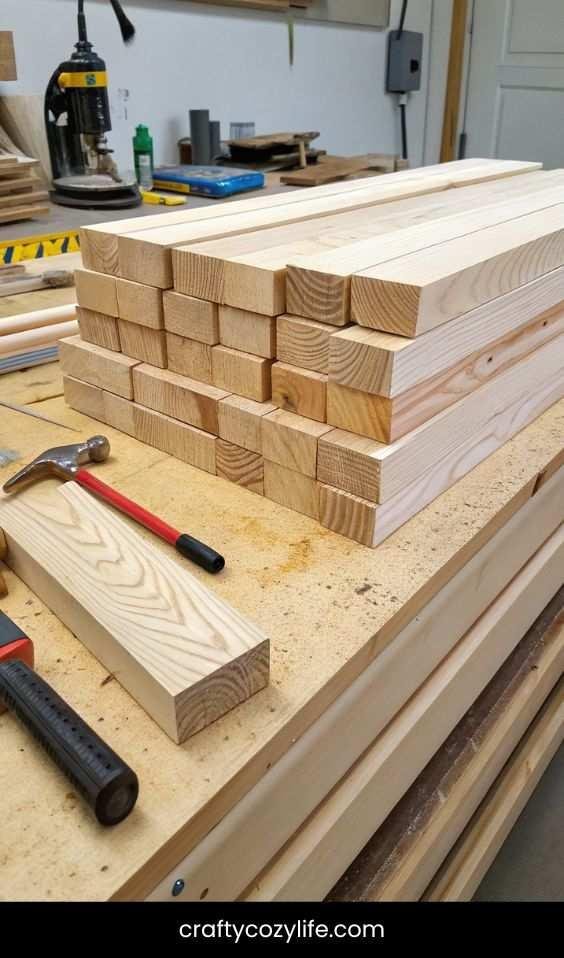
Now comes the fun part—cutting! If you don’t have a saw, most home improvement stores will cut the wood for you.
Steps:
- Use your blueprint to mark measurements on your plywood or MDF board.
- Cut the sides, back, top, bottom, and shelves.
- Sand all the edges for a smooth finish.
Picture This: Freshly cut wood pieces, neatly stacked on your workbench, waiting to transform into the pantry cabinet of your dreams.
3. Assemble the Pantry Frame
Time to bring it all together! Think of this step as the moment your DIY pantry cabinet starts to come to life.
Steps:
- Attach the sides to the back panel using wood glue and screws.
- Secure the bottom and top panels.
- Use a level to make sure everything is straight.
Picture This: Your cabinet frame standing firm, like a blank canvas waiting for shelves, doors, and a splash of personality.
4. Add the Shelves
What’s a pantry without shelves? Adjustable shelves are a great option if you want flexibility.
Steps:
- Mark where each shelf will go.
- Install shelf brackets if using, or secure the shelves with screws.
- Double-check that everything is level.
Picture This: Sturdy shelves, evenly spaced, ready to hold jars of pasta, baskets of snacks, and all your kitchen essentials.
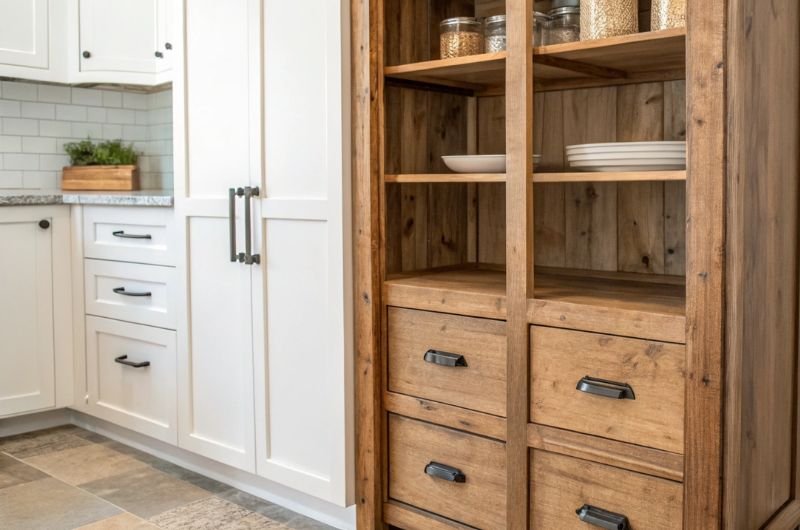
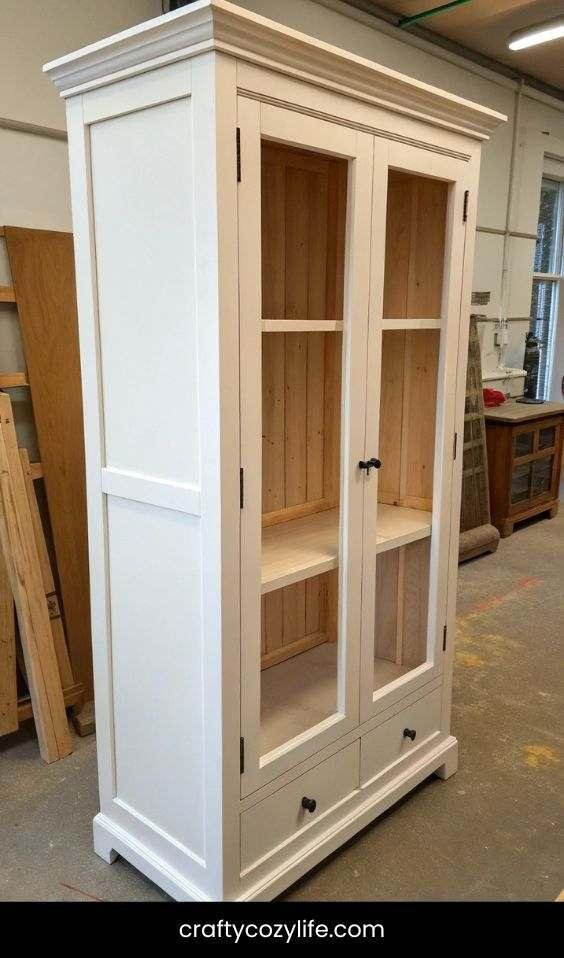
5. Attach the Doors and Hardware
If you want a sleek, finished look, doors are a must!
Steps:
- Attach hinges to the doors.
- Align them with the cabinet and screw them into place.
- Add knobs or handles.
Picture This: Smooth, perfectly aligned doors that swing open effortlessly, revealing a beautifully organized pantry inside.
6. Paint, Stain, and Finish
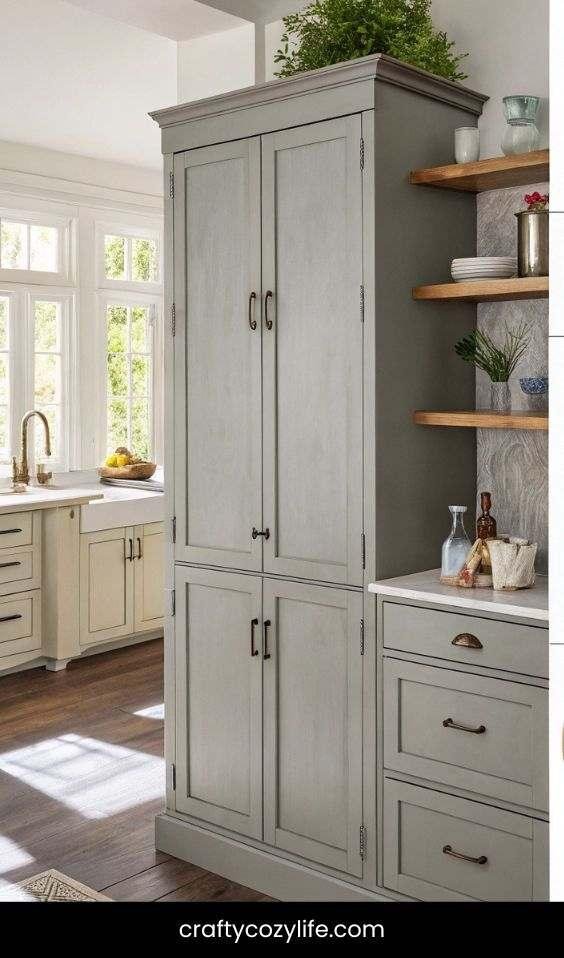
This is where you can let your creativity shine! Whether you go for a rustic farmhouse look or a modern, minimalist vibe, the finish sets the tone.
Steps:
- Sand any rough spots.
- Apply primer if painting.
- Paint or stain in thin, even coats.
- Let it dry completely before use.
Picture This: A stunning DIY pantry cabinet, painted in a chic shade that complements your kitchen, making the space look straight out of a design magazine.
7. Install Adjustable Shelf Pegs
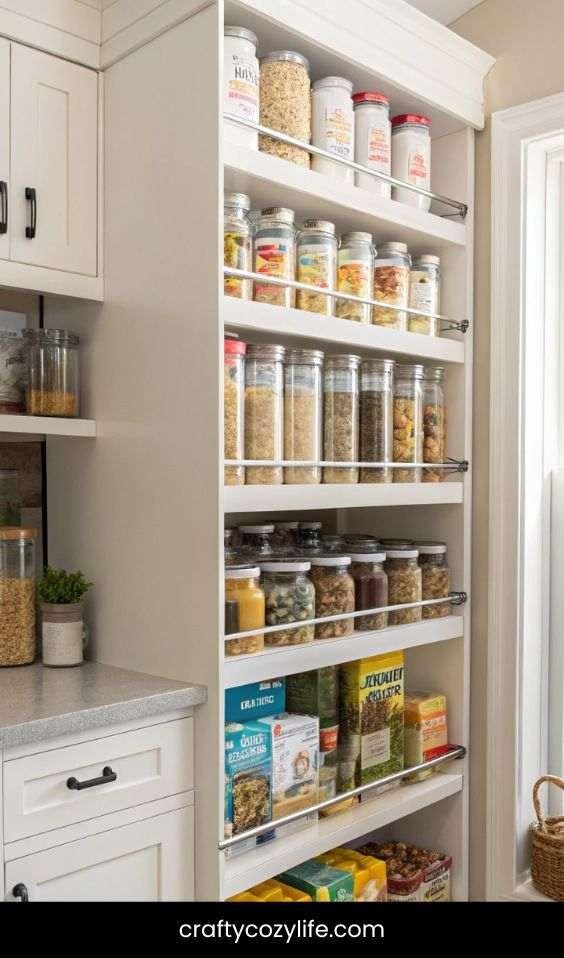
For ultimate flexibility, consider adding adjustable shelf pegs. This allows you to move shelves around to fit different-sized items.
Steps:
- Drill evenly spaced holes along the interior sides of the cabinet.
- Insert shelf pegs into the holes.
- Place the shelves on top of the pegs, adjusting as needed.
Picture This: A pantry that evolves with your needs, where tall cereal boxes and tiny spice jars fit perfectly at all times.
8. Add a Built-in Spice Rack
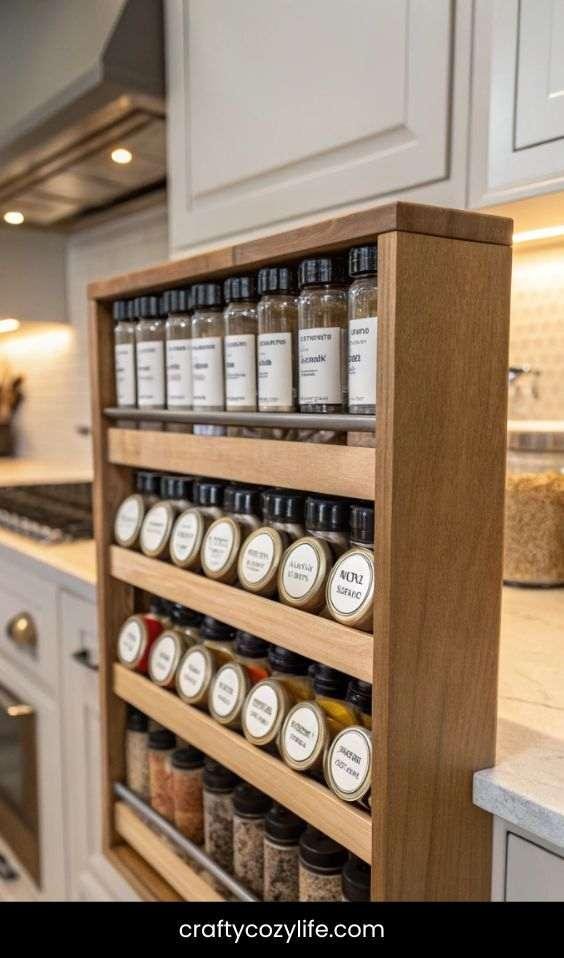
Maximize space by installing a small spice rack inside the cabinet door for easy access.
Steps:
- Cut and assemble a narrow shelf unit.
- Attach it securely to the inside of the door.
- Arrange your spices in a visually pleasing way.
Picture This: Rows of neatly labeled spice jars at your fingertips, making cooking a breeze.
9. Install Sliding Drawers for Easy Access
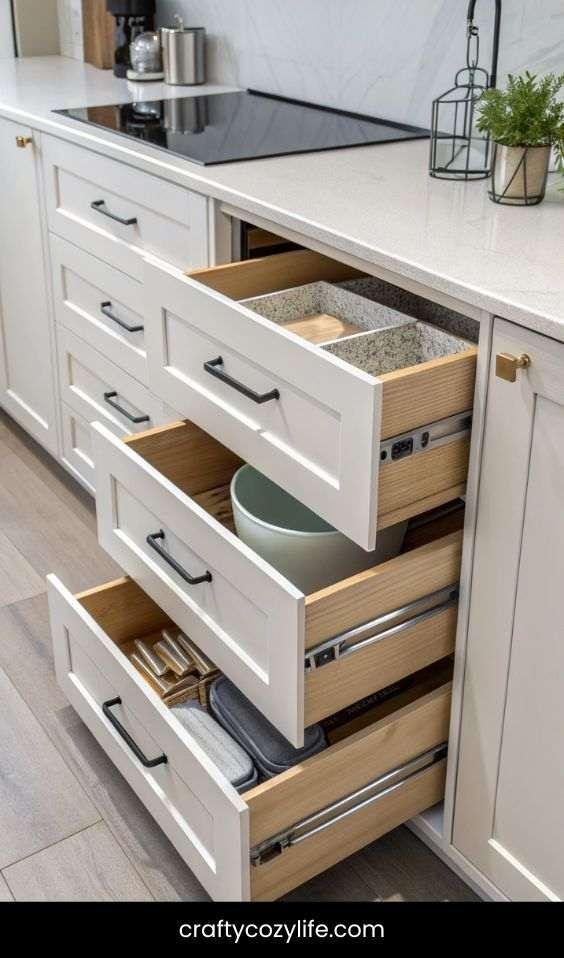
Deep shelves can make it hard to reach items in the back, so adding pull-out drawers is a game-changer.
Steps:
- Measure and cut wood for drawer boxes.
- Assemble and attach drawer slides inside the cabinet.
- Secure the drawers and test their movement.
Picture This: Smooth-gliding drawers that pull out effortlessly, revealing every stored item without digging.
10. Include Hooks for Hanging Storage

Hooks are a great way to store aprons, measuring cups, or reusable grocery bags.
Steps:
- Mark hook placement inside or outside the cabinet.
- Screw in sturdy hooks.
- Hang lightweight kitchen essentials.
Picture This: A perfectly organized pantry where every tool has a designated home, saving you time and frustration.
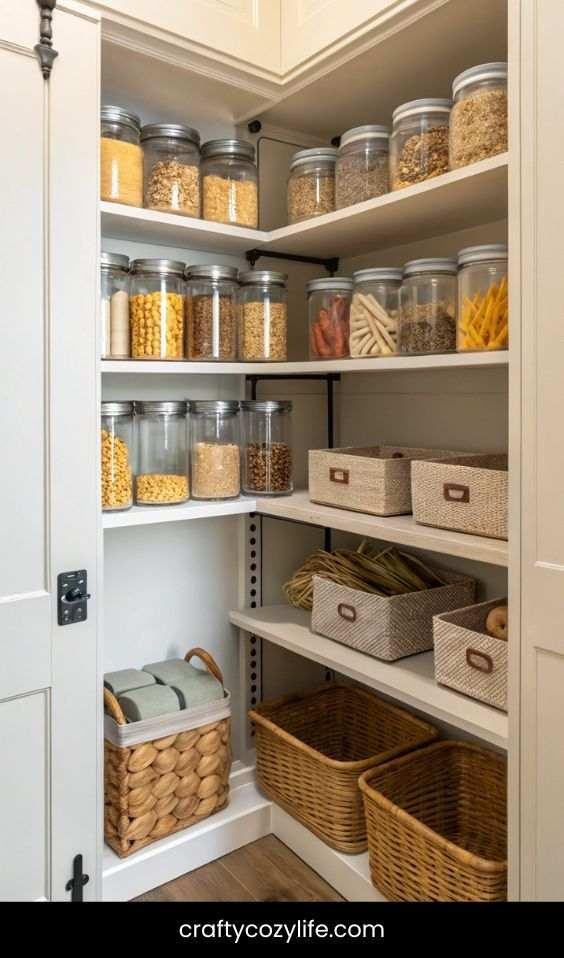
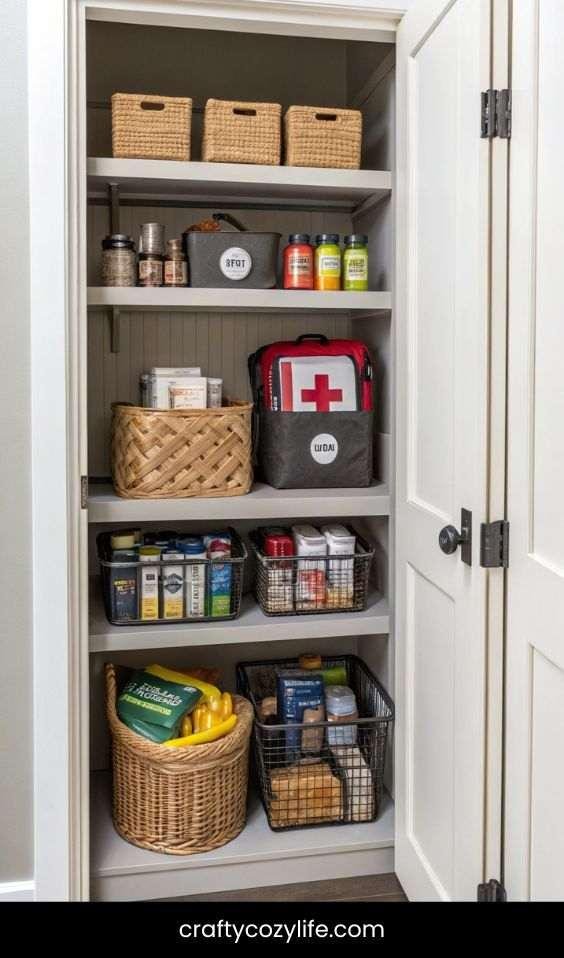
11. Incorporate Clear Bins for Organization
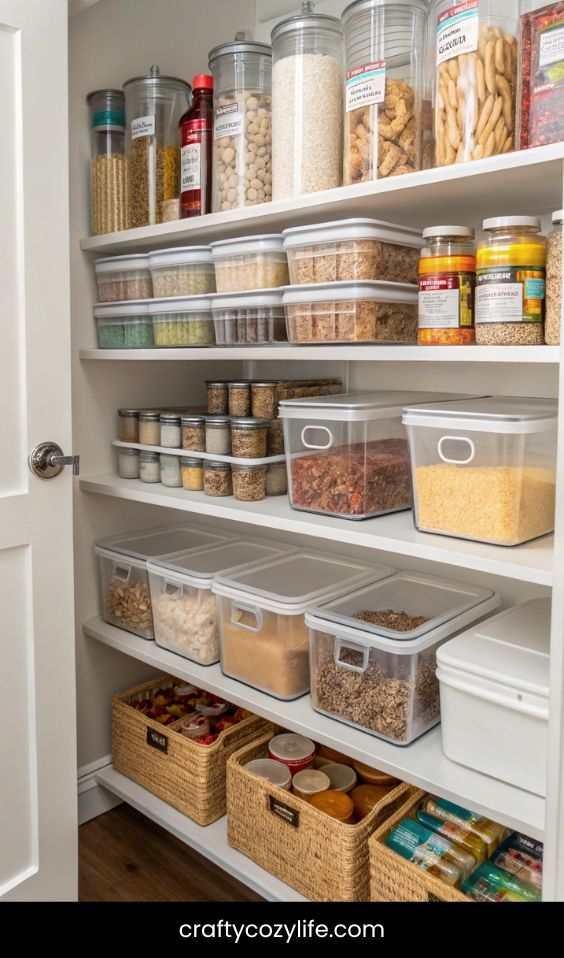
Clear bins keep smaller items like snacks, baking supplies, and condiments neat and visible.
Steps:
- Choose stackable, clear bins for easy storage.
- Label each bin for quick identification.
- Arrange them strategically on shelves.
Picture This: A pantry where everything is easy to find, cutting down on food waste and grocery overbuying.
12. Install LED Lighting
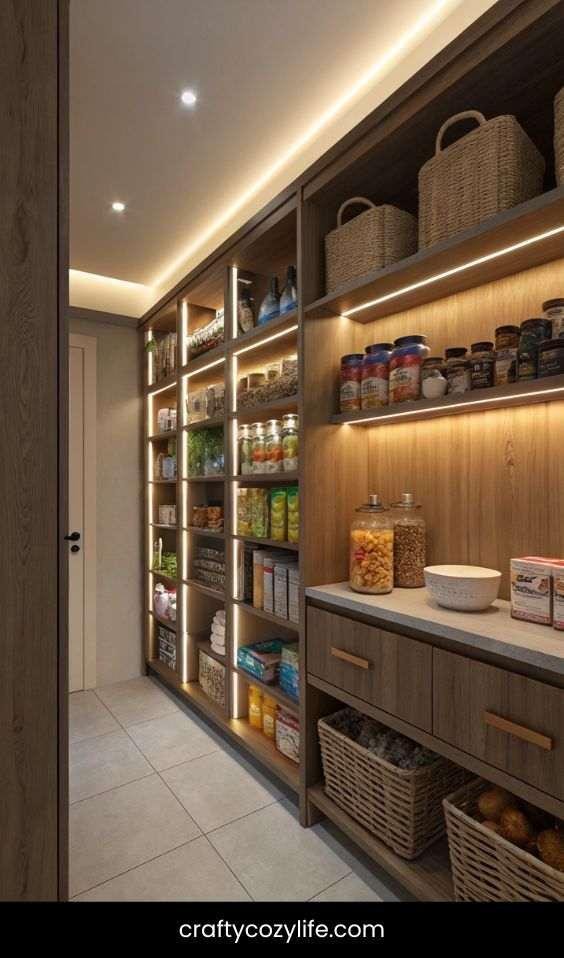
Good lighting makes it easier to see everything in your pantry, especially in deep cabinets.
Steps:
- Choose battery-operated or plug-in LED strip lights.
- Attach them along the inside edges of the cabinet.
- Test and adjust for the best illumination.
Picture This: A softly glowing pantry that makes midnight snack searches effortless.
13. Use Chalkboard or Dry Erase Labels
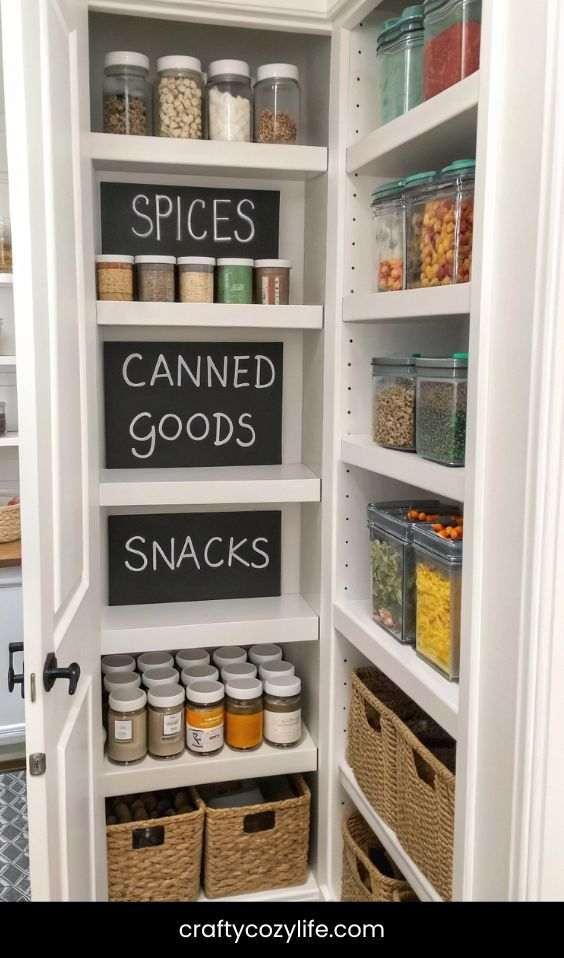
Labeling shelves and containers prevents clutter and keeps your pantry organized.
Steps:
- Write categories on chalkboard labels.
- Stick them on bins or shelves.
- Easily update them as needed.
Picture This: A stylish, well-labeled pantry where everyone in the family knows where everything goes.
14. Create a Hidden Storage Section
If you want to store less-used items, consider a hidden compartment within your pantry.
Steps:
- Use a false back or hidden drawer in the lower section.
- Store extra bulk items or emergency food supplies.
- Keep the space discreet but accessible.
Picture This: A secret stash of essentials, neatly tucked away but easy to grab when needed.
15. Attach a Rolling Cart for Extra Storage
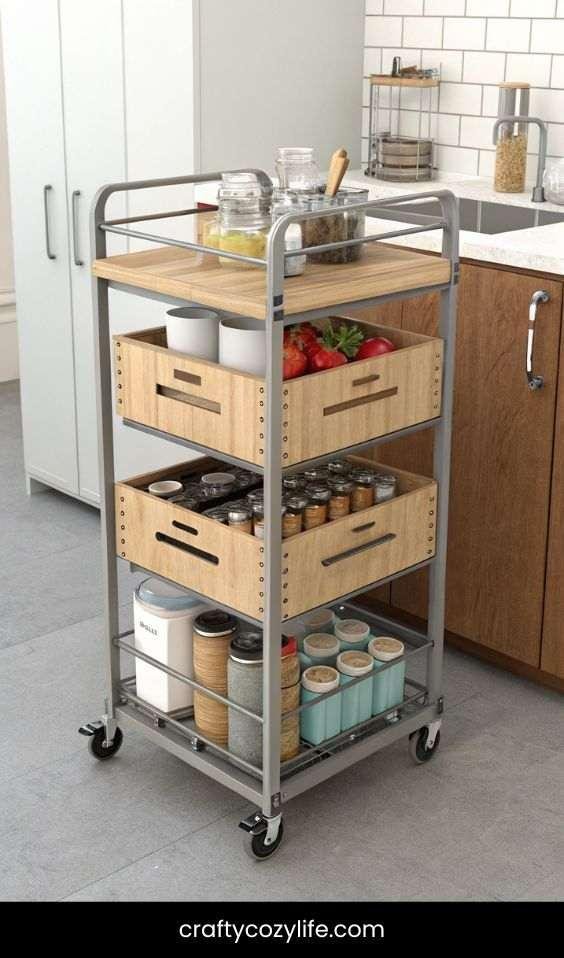
If space allows, a rolling cart can provide additional storage and be moved as needed.
Steps:
- Choose a slim rolling cart that fits between pantry shelves.
- Store items like canned goods or kitchen linens.
- Roll it out when needed and tuck it away when not in use.
Picture This: A mobile pantry extension that gives you extra storage without taking up permanent space.
FAQs
1. How much does it cost to build a DIY pantry cabinet?
The cost varies depending on the materials you choose. On average, a basic DIY pantry cabinet can cost between $100-$300, while a high-end version with custom features could go up to $500 or more.
2. How long does it take to build a pantry cabinet?
If you have all the materials and tools ready, a simple pantry cabinet can be built in a weekend (8-12 hours total work time). More complex designs with drawers, doors, and custom finishes might take a few extra days.
3. What type of wood should I use?
For a sturdy yet affordable option, plywood or MDF (medium-density fiberboard) works well. If you want a premium look, consider hardwoods like oak, maple, or birch.
4. Can I build a pantry cabinet without power tools?
Yes, but it will be more time-consuming. A hand saw, hammer, and screwdriver can be used instead of a circular saw and power drill. However, power tools will speed up the process significantly.
5. How do I make my pantry cabinet look professional?
- Sand all wood surfaces for a smooth finish.
- Use primer before painting for even coverage.
- Install soft-close hinges and drawer slides for a high-end feel.
- Choose matching handles and hardware for a cohesive look.
6. What’s the best way to maximize small pantry space?
- Install adjustable shelves to fit different-sized items.
- Add pull-out drawers for easy access.
- Use clear bins and labels to keep everything organized.
- Consider door storage solutions, like spice racks or hooks.
7. Can I turn a closet into a pantry cabinet?
Absolutely! Many people convert unused closets into pantry storage by adding shelves, lighting, and organizational bins. If the space is deep, consider installing pull-out shelves or drawers.
8. Should I use paint or stain for my pantry cabinet?
It depends on your style preference:
- Paint gives a modern, clean look and works well with MDF and plywood.
- Stain enhances natural wood grain, perfect for solid wood cabinets.
9. How can I prevent my pantry from looking cluttered?
- Use matching storage containers for dry goods.
- Label shelves and bins for easy identification.
- Keep a “declutter” bin and remove expired or unused items regularly.
- Organize by category (e.g., baking supplies, snacks, canned goods).
10. What’s the best way to add lighting to my pantry cabinet?
- LED strip lights for a soft glow inside shelves.
- Motion sensor lights that turn on when you open the door.
- Battery-operated puck lights if there’s no electrical wiring.
Closing Thoughts
Building your own DIY pantry cabinet isn’t just about adding storage—it’s about creating a space that brings order, beauty, and a little joy to your daily kitchen routine. With a little planning, some hands-on effort, and a touch of creativity, you can transform your pantry into a Pinterest-worthy masterpiece that’s both functional and stylish.
Whether you’re tackling a small nook, repurposing a closet, or designing a custom-built pantry from scratch, this project is totally doable—even for beginners! Plus, nothing beats the satisfaction of standing back and admiring something you built with your own hands.
So, what are you waiting for? Grab your tools, pour another cup of coffee, and get started on your dream pantry today. And don’t forget—once you’re done, snap a pic and share your masterpiece on Pinterest. Happy building!