14 DIY Rustic Decor Ideas to Add Cozy Charm to Your Home
You’re curled up on a comfy couch, surrounded by warm wooden accents, soft textures, and the faint scent of fresh pine. Your home feels like a cozy cabin retreat, even if you’re in the middle of the city. Sounds dreamy, right? Well, guess what? You don’t need a big budget or a team of designers to create that rustic vibe. With a little creativity and some DIY magic, you can transform your space into a rustic haven.
In this article, I’ll share 14 DIY Rustic Decor Ideas that are easy, affordable, and totally Pinterest-worthy. Whether you’re a seasoned crafter or a newbie with a glue gun, these projects will inspire you to roll up your sleeves and get creative. Let’s make your home the cozy sanctuary you’ve always dreamed of!
What You Might Need:
Before we dive in, here’s a quick list of supplies you might want to have on hand:
- Reclaimed wood or pallets
- Mason jars
- Twine or jute rope
- Chalk paint or matte paint
- Sandpaper
- Hot glue gun
- Scissors
- Fresh or faux greenery (e.g., eucalyptus, pine branches)
- Candles or fairy lights
- Old books, frames, or vintage items
Now, let’s get started!
1. Rustic Wooden Wall Art
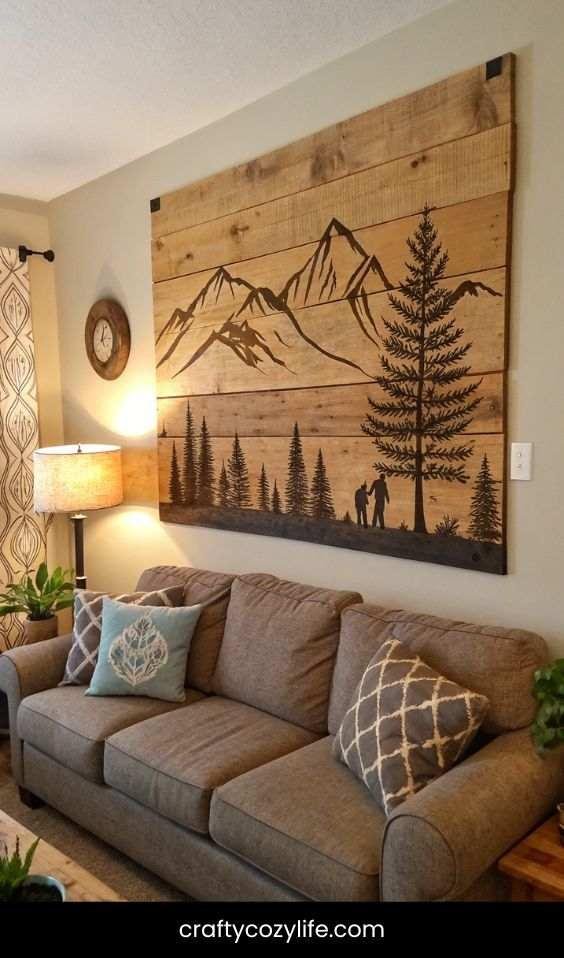
Imagine this: A stunning piece of wall art made from reclaimed wood, adding texture and warmth to your living room or bedroom.
Step-by-Step:
- Gather Materials: Find a piece of reclaimed wood or pallet wood. Sand it down to smooth any rough edges.
- Design Your Art: Decide on a simple design—think geometric shapes, a mountain silhouette, or a heartfelt quote.
- Paint or Stain: Use chalk paint or stain to create your design. Let it dry completely.
- Seal It: Apply a clear sealant to protect your artwork.
- Hang It Up: Attach picture hangers to the back and display your masterpiece!
Picture This: Your rustic wooden wall art hangs above your couch, its natural grain and hand-painted design catching the light. It’s the perfect focal point for your cozy living room.
2. Mason Jar Herb Garden
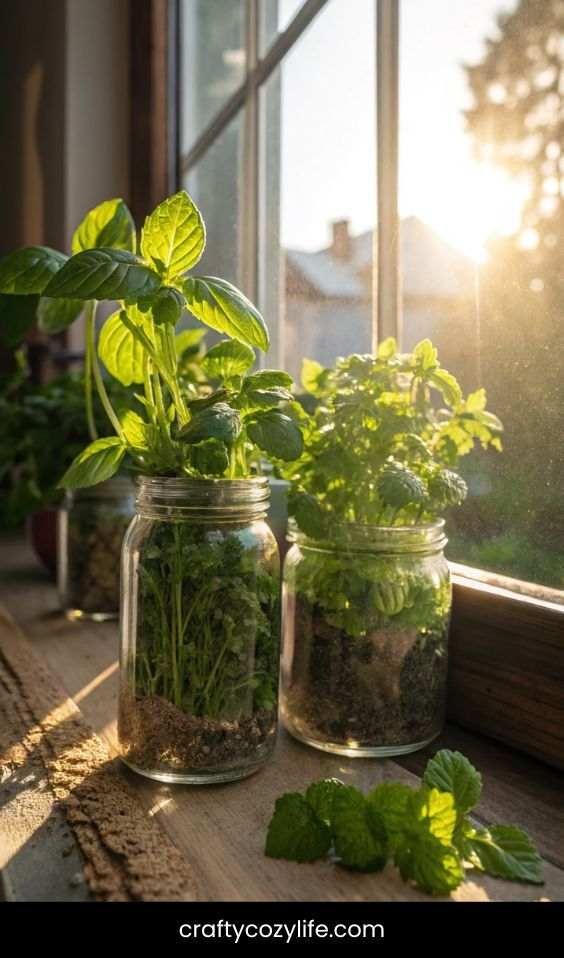
Imagine this: A charming windowsill filled with mason jars, each holding fresh herbs like basil, rosemary, and mint.
Step-by-Step:
- Prep the Jars: Clean and dry your mason jars. Paint the lids with chalk paint for a rustic look.
- Add Soil: Fill each jar with potting soil.
- Plant Herbs: Plant your favorite herbs in the jars.
- Label Them: Use twine and small chalkboard tags to label each herb.
- Display: Line them up on your kitchen windowsill or a wooden shelf.
Picture This: Sunlight streams through the window, illuminating your mason jar herb garden. The fresh scent of herbs fills the air as you pluck a few leaves for dinner.
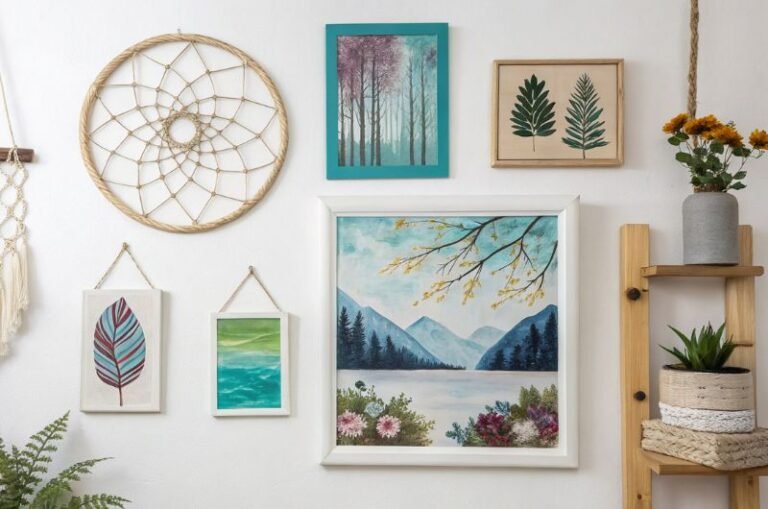
3. DIY Rustic Picture Frames
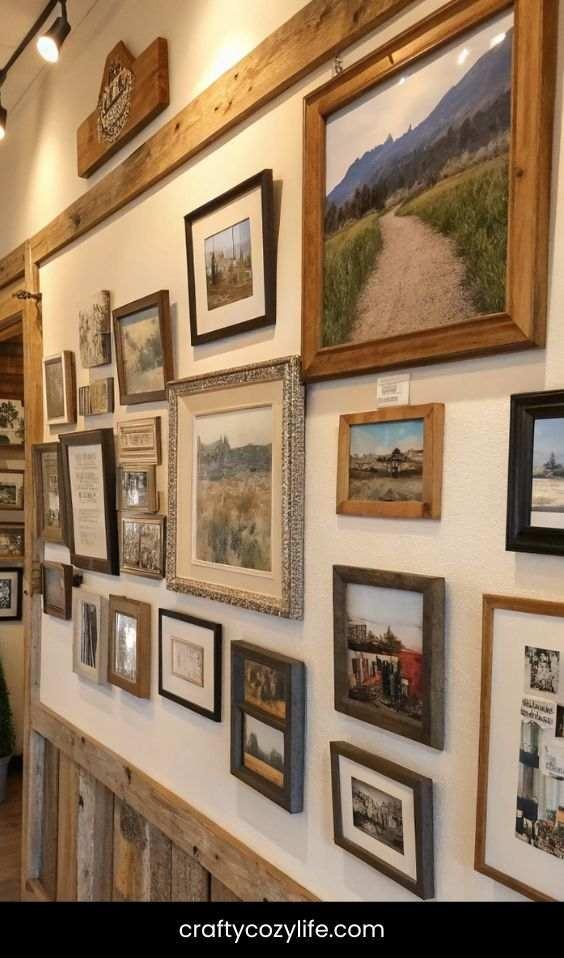
Imagine this: A gallery wall filled with rustic wooden frames, showcasing your favorite memories.
Step-by-Step:
- Find Old Frames: Hunt for wooden frames at thrift stores or garage sales.
- Sand and Paint: Sand the frames to remove old finishes, then paint them with matte paint or stain.
- Distress the Edges: Lightly sand the edges to create a weathered look.
- Insert Photos: Add your favorite photos or prints.
- Arrange on the Wall: Create a gallery wall by arranging the frames in a cohesive layout.
Picture This: Your gallery wall tells the story of your life, with each rustic frame adding a touch of warmth and nostalgia.
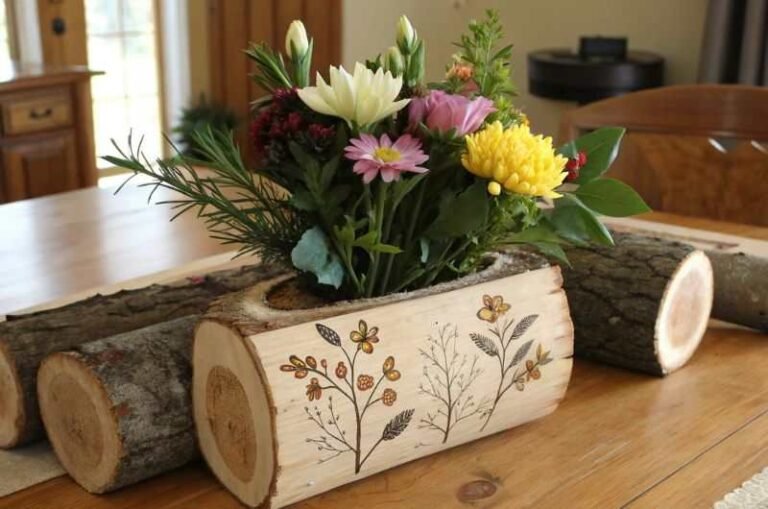
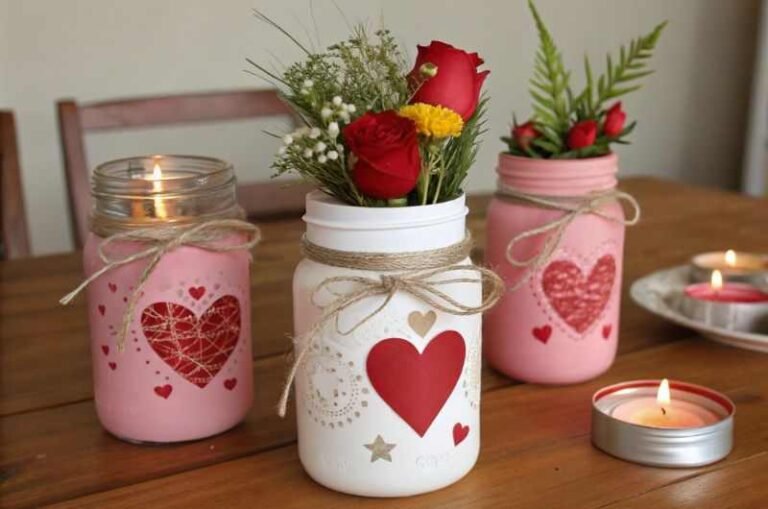
4. Twine-Wrapped Vases
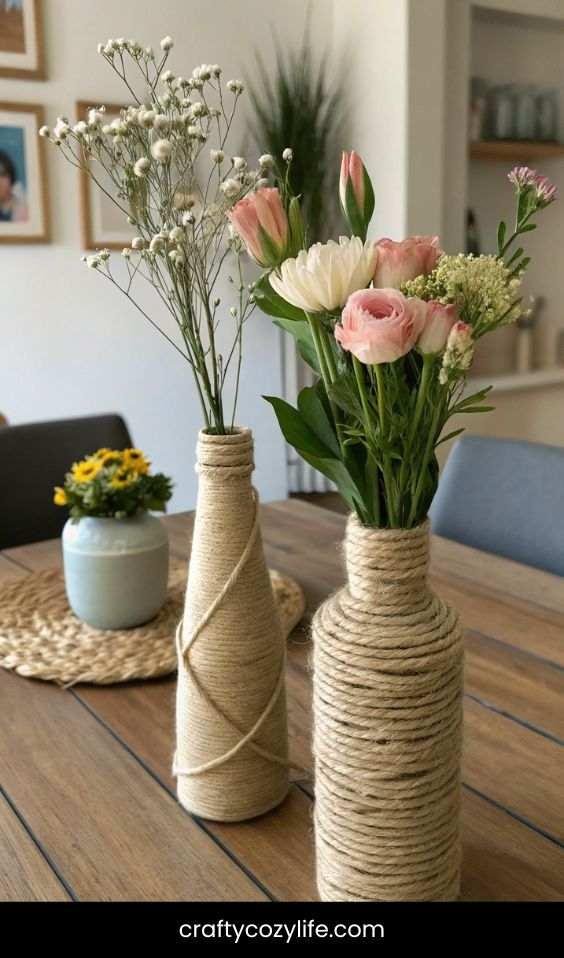
Imagine this: Simple glass vases transformed into rustic treasures with just a bit of twine.
Step-by-Step:
- Choose Your Vases: Pick clear glass vases or jars in various sizes.
- Wrap with Twine: Starting at the base, wrap twine around the vase, securing it with hot glue as you go.
- Add Greenery: Fill the vases with fresh flowers, dried branches, or faux greenery.
Picture This: Your twine-wrapped vases sit on a wooden dining table, their natural texture complementing the fresh blooms inside.
5. Rustic Wooden Candle Holders
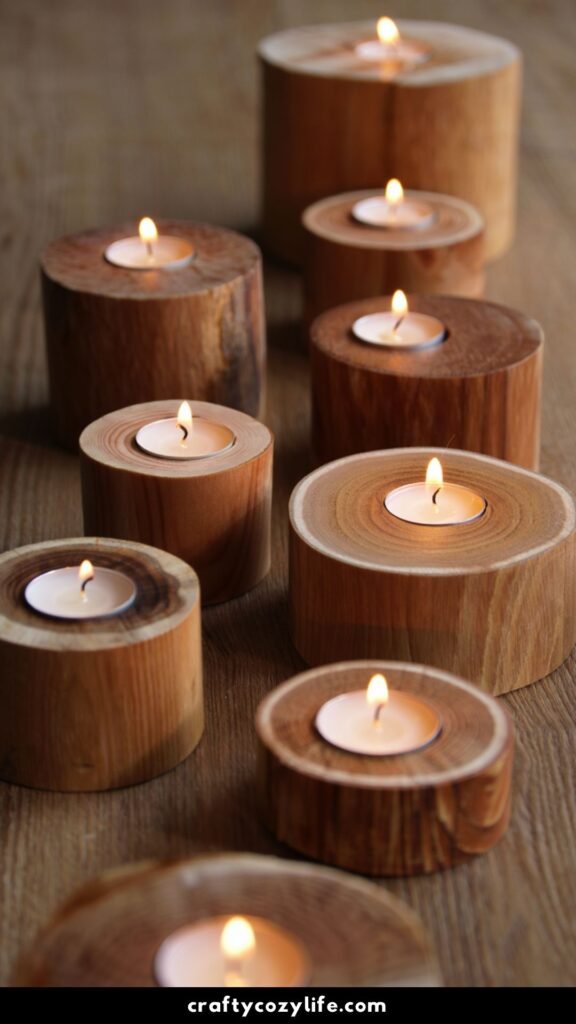
Imagine this: Handmade wooden candle holders casting a warm, flickering glow across your space.
Step-by-Step:
- Cut the Wood: Use a saw to cut a piece of wood into small blocks or slices.
- Drill Holes: Drill holes in the center of each block to fit tea lights or small candles.
- Sand and Stain: Sand the edges and apply a wood stain for a rustic finish.
- Add Candles: Place tea lights or small candles in the holes.
Picture This: The soft glow of candlelight dances across the room, creating a cozy, inviting atmosphere.
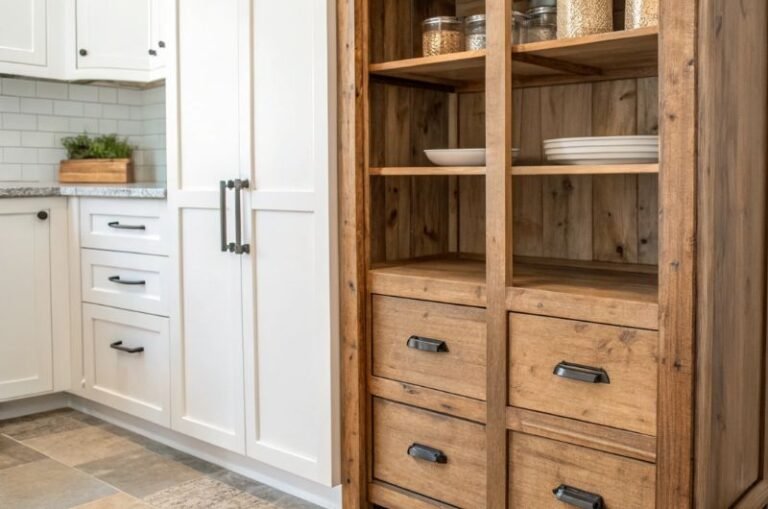
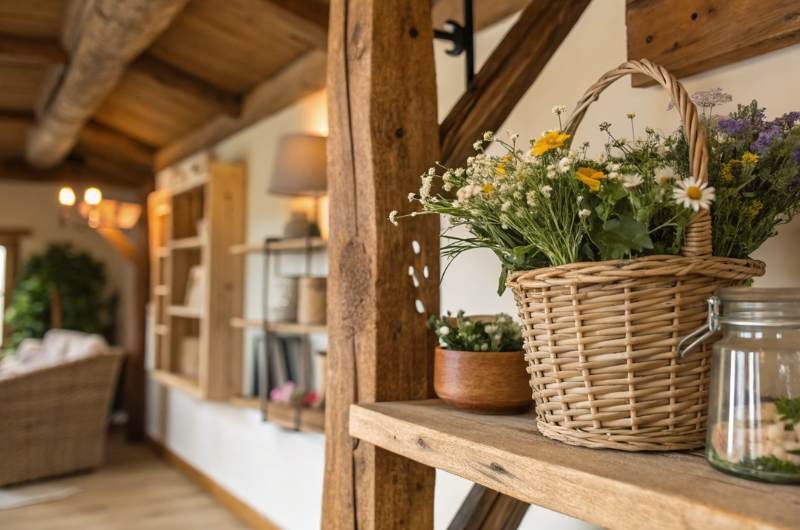
6. DIY Rustic Shelves
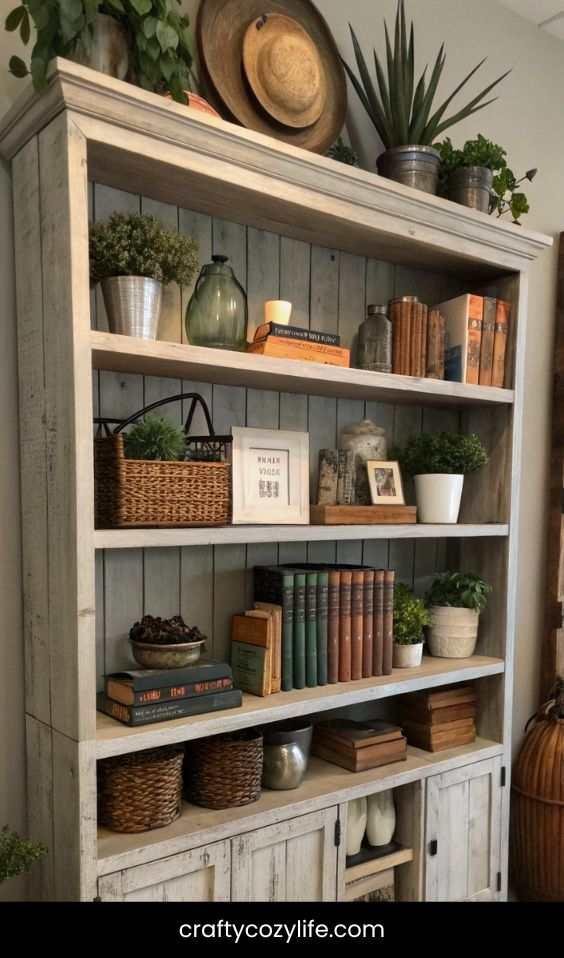
Imagine this: Floating wooden shelves displaying your favorite books, plants, and trinkets.
Step-by-Step:
- Cut the Wood: Cut reclaimed wood or pallet wood to your desired shelf size.
- Sand and Stain: Sand the wood and apply a stain or paint.
- Attach Brackets: Secure metal brackets to the wall and the wood.
- Style Your Shelves: Add books, plants, and decorative items.
Picture This: Your rustic shelves are a mini gallery of your favorite things, adding both function and charm to your space.
7. Vintage Book Planters
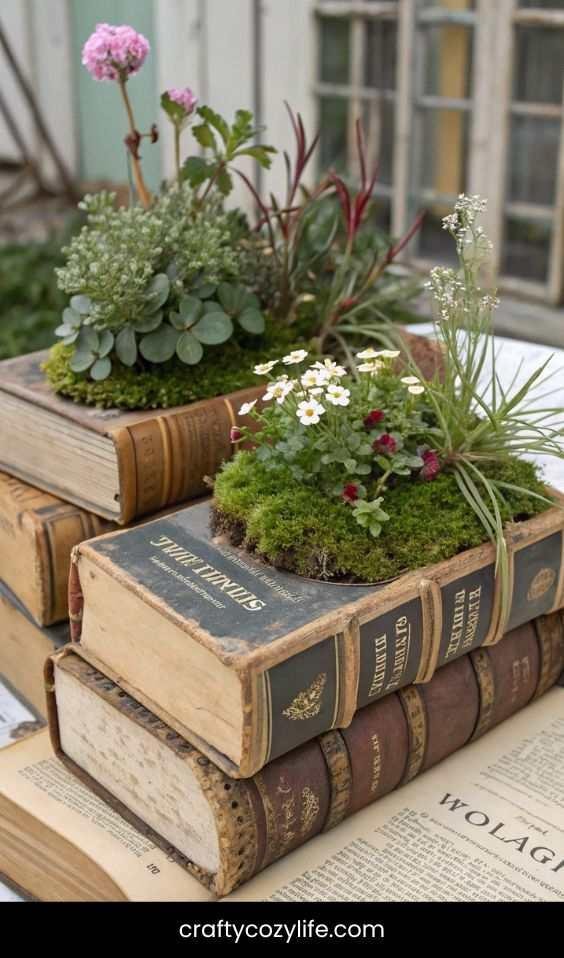
Imagine this: Old books turned into unique planters, adding a touch of whimsy to your decor.
Step-by-Step:
- Choose a Book: Find an old hardcover book you don’t mind repurposing.
- Cut the Pages: Use a craft knife to cut a hole in the center of the pages.
- Add a Pot: Place a small plastic pot inside the hole.
- Plant a Succulent: Add soil and a small succulent or air plant.
Picture This: Your vintage book planter sits on a side table, its pages holding a tiny green treasure.
8. Rustic Rope Mirror
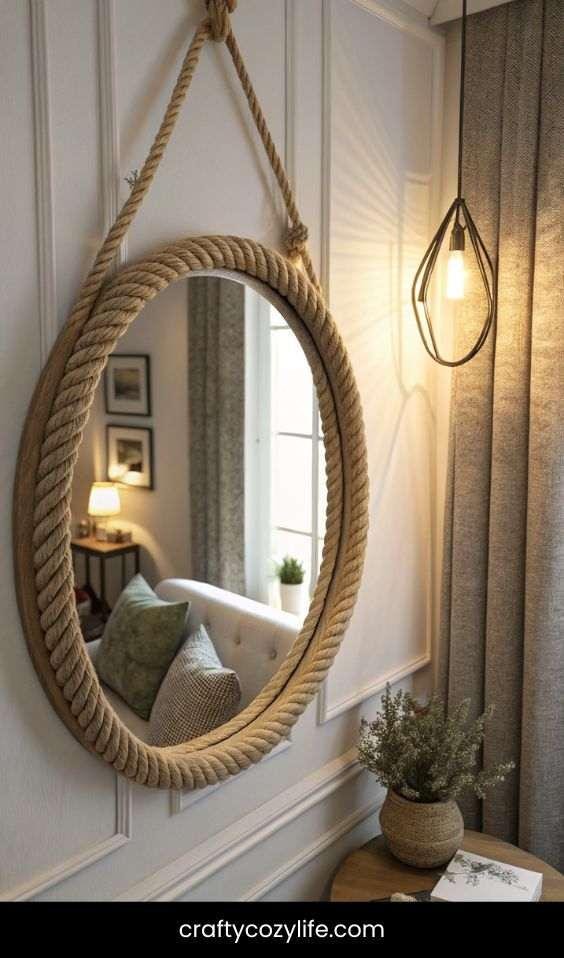
Imagine this: A simple mirror transformed into a statement piece with a rope frame.
Step-by-Step:
- Choose a Mirror: Pick a plain round or rectangular mirror.
- Wrap with Rope: Use hot glue to attach thick jute rope around the edges.
- Hang It Up: Display your new rustic mirror on a wall or above a dresser.
Picture This: The rope-framed mirror reflects the soft light in your room, adding texture and charm.
9. DIY Rustic Coasters
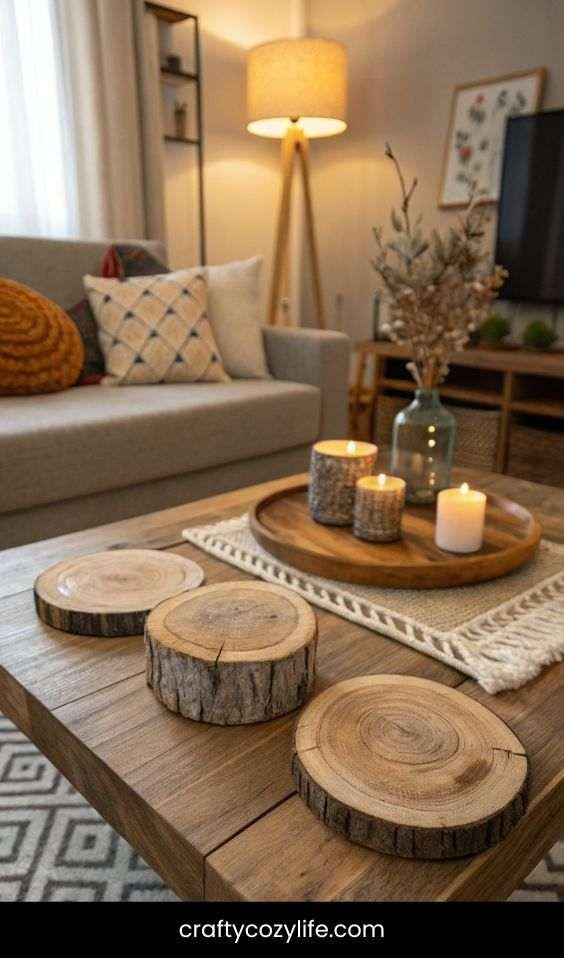
Imagine this: Handmade wooden coasters protecting your surfaces in style.
Step-by-Step:
- Cut Wood Slices: Use a saw to cut thin slices of wood.
- Sand the Edges: Smooth any rough spots with sandpaper.
- Seal the Wood: Apply a clear sealant to protect the coasters.
Picture This: Your rustic coasters sit on a coffee table, their natural beauty adding a touch of warmth to your living room.
10. Rustic Ladder Shelf

Imagine this: A repurposed wooden ladder leaning against the wall, holding blankets, plants, and decor.
Step-by-Step:
- Find a Ladder: Look for an old wooden ladder at a thrift store or flea market.
- Clean and Sand: Clean the ladder and sand any rough spots.
- Style It: Lean it against the wall and use the rungs to hang blankets, plants, or baskets.
Picture This: Your rustic ladder shelf is both functional and beautiful, adding a farmhouse touch to your space.
11. DIY Rustic Blanket Ladder
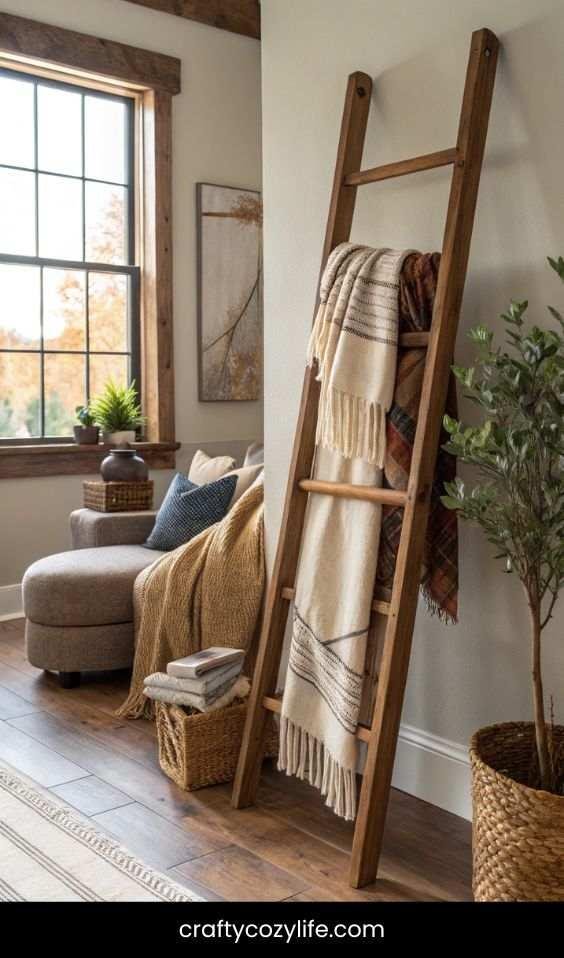
Imagine this: A charming wooden ladder draped with cozy blankets, ready for chilly evenings.
Step-by-Step:
- Gather Materials: You’ll need two long wooden dowels and four shorter ones for the rungs.
- Assemble the Ladder: Use wood glue and nails to attach the rungs to the longer dowels.
- Sand and Stain: Sand the ladder to smooth any rough spots, then apply a wood stain.
- Style It: Lean the ladder against a wall and drape your favorite blankets over the rungs.
Picture This: Your rustic blanket ladder stands in the corner of your living room, its warm wood tones complementing the soft, cozy blankets.
12. Rustic Mason Jar Chandelier
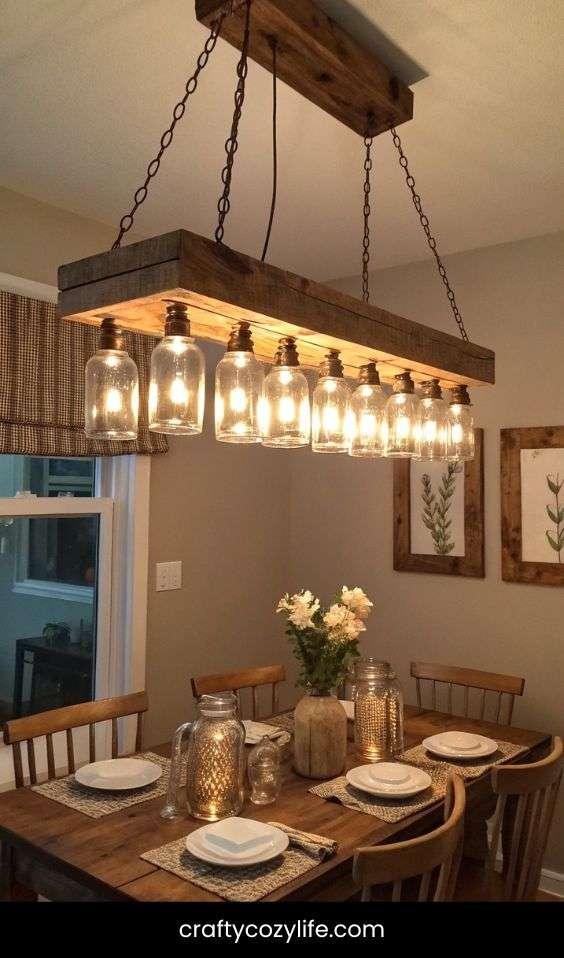
Imagine this: A stunning chandelier made from mason jars, casting a warm, ambient glow.
Step-by-Step:
- Gather Supplies: You’ll need a wooden board, mason jars, and pendant light kits.
- Drill Holes: Drill holes in the wooden board to fit the mason jar lids.
- Attach the Jars: Secure the mason jars to the lids and hang them from the board.
- Wire the Lights: Follow the pendant light kit instructions to wire the lights inside the jars.
- Hang It Up: Suspend your chandelier from the ceiling using chains or rope.
Picture This: Your rustic mason jar chandelier hangs above your dining table, its soft light creating a warm, inviting atmosphere.
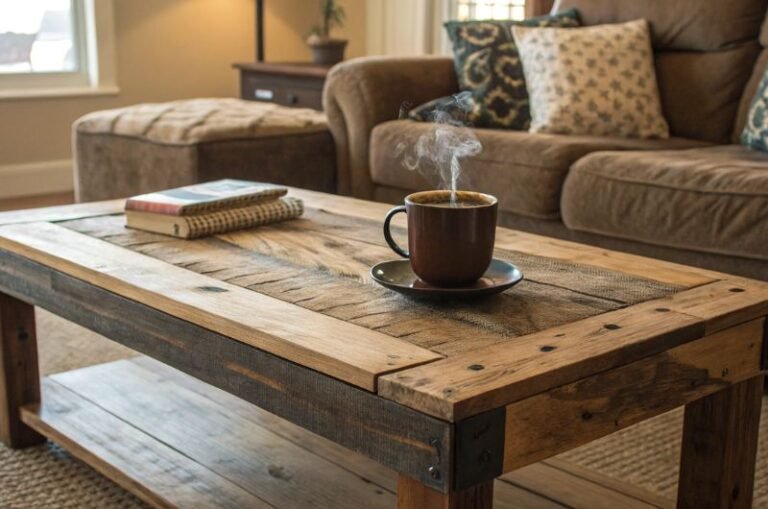
13. DIY Rustic Wooden Tray
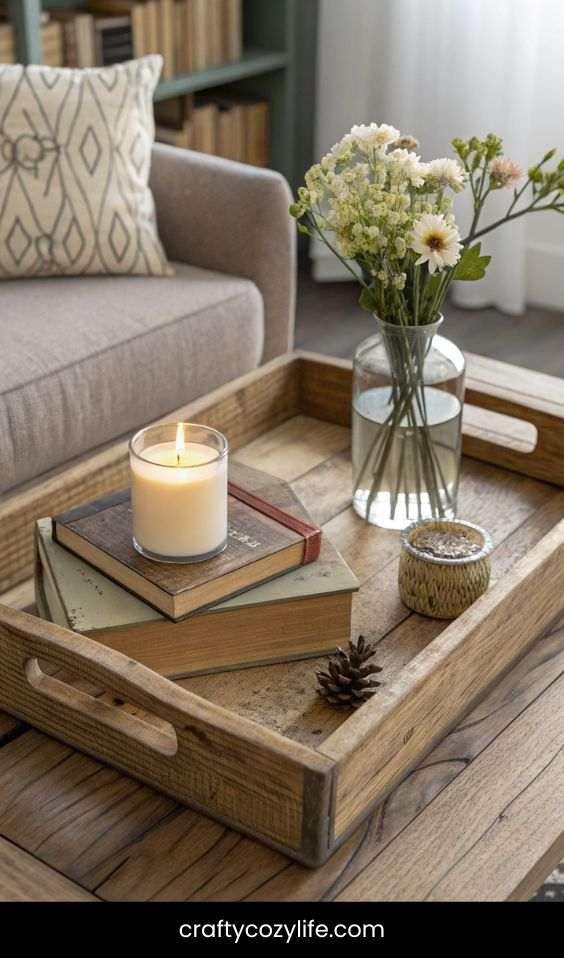
Imagine this: A handmade wooden tray, perfect for serving breakfast in bed or displaying decor.
Step-by-Step:
- Cut the Wood: Cut a piece of wood to your desired tray size.
- Sand It Smooth: Sand the edges and surface until smooth.
- Add Handles: Attach small wooden handles or drawer pulls to the sides.
- Stain or Paint: Apply a wood stain or chalk paint for a rustic finish.
- Seal It: Use a clear sealant to protect the tray.
Picture This: Your rustic wooden tray sits on your coffee table, holding a stack of books, a candle, and a small vase of fresh flowers.
14. Rustic Burlap Table Runner
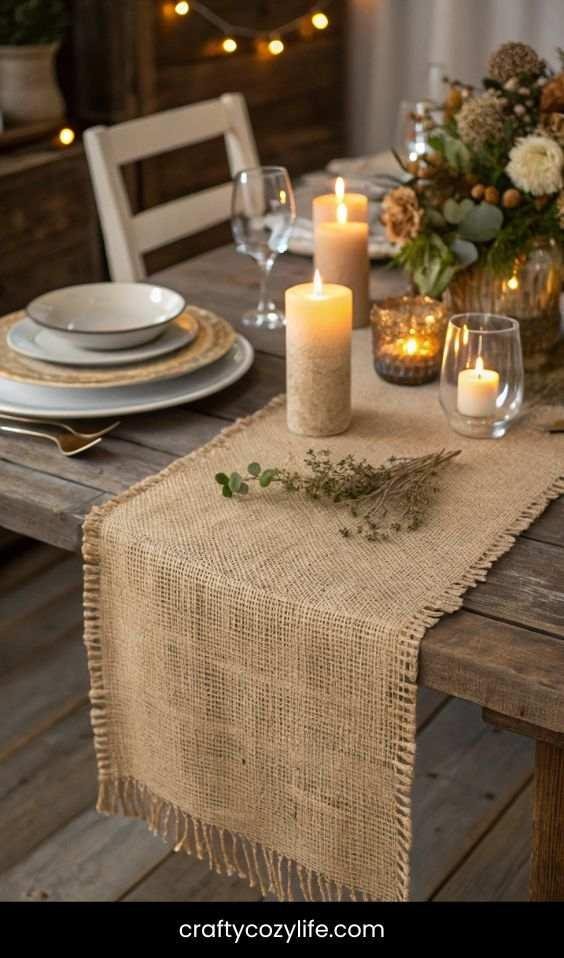
Imagine this: A simple yet elegant burlap table runner, adding texture to your dining table.
Step-by-Step:
- Measure Your Table: Cut a piece of burlap to fit the length of your table, leaving some overhang on the ends.
- Hem the Edges: Fold the edges under and secure with fabric glue or a sewing machine.
- Add Embellishments: Stencil a design or sew on lace trim for extra charm.
- Style It: Lay the runner on your table and add candles, greenery, or place settings.
Picture This: Your rustic burlap table runner sets the stage for a cozy dinner party, its natural texture complementing the warm glow of candlelight.
FAQs
1. Where can I find reclaimed wood for my projects?
Reclaimed wood is a staple for rustic decor, and it’s easier to find than you might think! Check out:
- Local hardware stores (they often have scrap wood sections)
- Facebook Marketplace or Craigslist (people often give away old pallets or barn wood)
- Construction sites (ask for permission to take leftover wood)
- Flea markets or antique shops
Pro Tip: Sand reclaimed wood thoroughly to remove splinters and old finishes before using it in your projects.
2. What’s the best paint for a rustic look?
For that perfect rustic vibe, go for chalk paint or matte paint. These finishes have a soft, weathered look that complements rustic decor. You can also use wood stain to enhance the natural grain of the wood.
Bonus Idea: Distress your painted pieces by lightly sanding the edges after the paint dries. It adds instant vintage charm!
3. How do I make my DIY projects look professional?
The secret is in the details! Here are a few tips:
- Sand everything: Smooth edges and surfaces make your projects look polished.
- Use quality materials: Invest in good paint, brushes, and tools.
- Take your time: Rushing can lead to mistakes, so enjoy the process!
- Seal your work: A clear sealant protects your projects and gives them a finished look.
4. Can I create rustic decor on a budget?
Absolutely! Rustic decor is all about simplicity and natural materials, which are often inexpensive. Here’s how to save:
- Use items you already have (like old jars, frames, or books).
- Shop at thrift stores, flea markets, or dollar stores.
- Repurpose old furniture or decor instead of buying new.
- Forage for natural elements like branches, pinecones, or stones.
Fun Fact: Some of the best rustic decor pieces are made from free or low-cost materials!
5. What if I’m not crafty? Can I still do these projects?
Of course! These DIY Rustic Decor Ideas are beginner-friendly and don’t require advanced skills. Start with simple projects like twine-wrapped vases or wooden coasters, and work your way up to more complex ones.
Remember: Imperfections add character to rustic decor, so don’t stress about making everything perfect.
6. How do I incorporate rustic decor into a modern home?
Rustic and modern styles can blend beautifully! Here’s how:
- Mix materials: Pair rustic wood with sleek metals or glass.
- Keep it minimal: Choose a few statement rustic pieces rather than overwhelming the space.
- Use neutral colors: Stick to a palette of whites, grays, and earthy tones to create harmony.
- Add greenery: Plants and fresh flowers bring life to any style.
Example: A rustic wooden coffee table looks stunning in a modern living room when paired with a sleek sofa and metallic accents.
7. What are some quick rustic decor ideas for renters?
If you’re renting and can’t make permanent changes, try these renter-friendly ideas:
- Use removable adhesive hooks to hang rustic wall art or shelves.
- Style a wooden tray or ladder shelf that can be moved easily.
- Add rustic touches with throw pillows, blankets, or table runners.
- Use command strips to hang lightweight decor like twine-wrapped mirrors or signs.
Pro Tip: Focus on decor that doesn’t require nails or drilling, so you can take it with you when you move.
8. How do I clean and maintain rustic decor?
Rustic decor is pretty low-maintenance, but here are a few tips to keep it looking fresh:
- Dust wooden pieces regularly with a soft cloth.
- Use a damp cloth to clean painted or sealed surfaces.
- Avoid harsh chemicals that can damage wood or paint.
- Refresh worn areas with a touch-up of paint or stain as needed.
Fun Fact: The natural wear and tear on rustic decor only adds to its charm over time!
Closing Thoughts
With these 14 DIY Rustic Decor Ideas, you’re well on your way to creating a home that’s warm, inviting, and full of character. Whether you’re crafting a rustic wooden sign, building a blanket ladder, or styling a mason jar chandelier, these projects are all about adding that cozy, handmade touch.
So grab your tools, put on your favorite playlist, and let’s get crafting! Your dreamy, rustic home is just a few DIY projects away.