15 DIY Wall Art Ideas That Are Actually Worth Hanging Up
When it comes to turning a house into a home, nothing says “personal touch” like DIY wall art. Whether you’re on a budget or just love adding a sprinkle of creativity to your space, DIY wall art is a fun, rewarding way to transform those blank walls into conversation starters. Think of it as decorating with heart—each piece tells a story, and the best part? You made it!
In this guide, we’re diving into some of the most creative DIY wall art ideas you can try. Whether you’re channeling your inner minimalist, boho spirit, or maximalist chic, there’s something here for everyone. You’ll also learn step-by-step how to recreate each idea, so grab your coffee, and let’s craft magic together.
What You Might Need:
Before we get started, here’s a quick list of supplies you’ll want to have handy.
- Blank canvases, wood panels, or sturdy cardboard
- Paints (acrylic, watercolors, or spray paint)
- Brushes, sponges, or palette knives
- Adhesives (glue gun, craft glue, or double-sided tape)
- Scissors, stencils, and painter’s tape
- Decorative extras: dried flowers, fabric scraps, string lights, etc.
- Creativity and a little patience
1. Minimalist Canvas Art
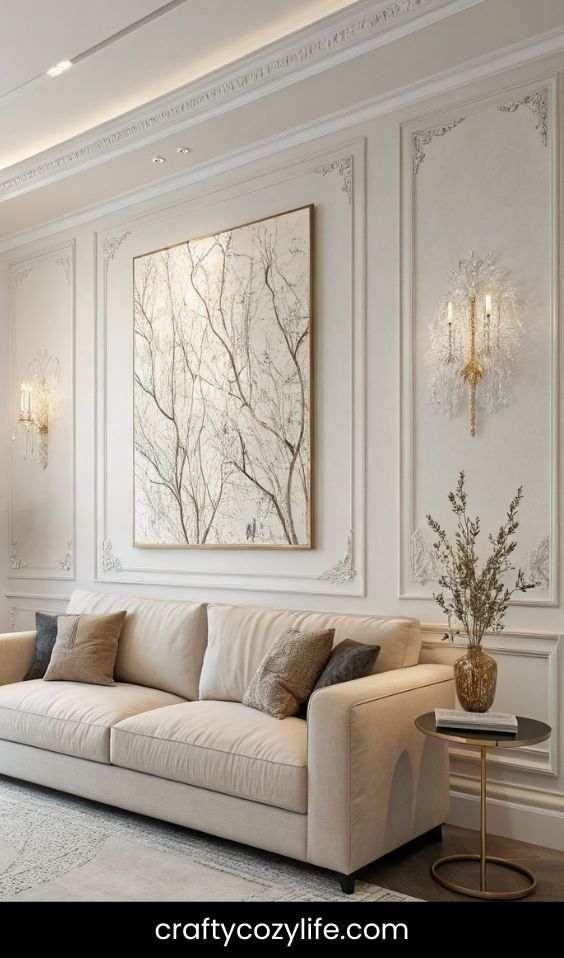
Let’s start with something simple yet impactful. Minimalist canvas art is all about clean lines and subtle tones that make a statement.
Step-by-Step:
- Start with a blank canvas or sturdy cardstock.
- Use painter’s tape to create geometric patterns or stripes.
- Choose two or three neutral or pastel colors and paint over the canvas.
- Let the paint dry and carefully peel off the tape for sharp, clean lines.
Picture This:
Imagine a sleek white living room with a soft beige sofa. Above it, your DIY minimalist canvas art steals the show—clean, modern, and oh-so-sophisticated.
2. Pressed Flower Wall Art
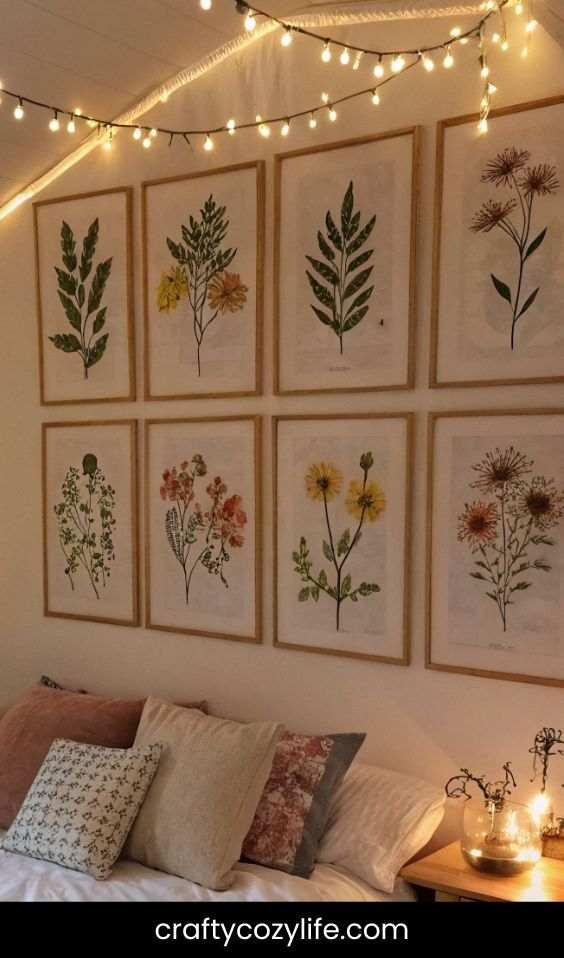
Nature lovers, this one’s for you! Preserve your favorite blooms in a frame for a touch of timeless beauty.
Step-by-Step:
- Collect flowers and leaves, and press them between heavy books for a week.
- Once dried, arrange them on a piece of cardstock or a clear glass panel.
- Use craft glue to secure the flowers in place, or sandwich them between two glass panes.
- Frame your creation and hang it up.
Picture This:
A cozy bedroom with fairy lights twinkling softly. Above the bed, your pressed flower art brings nature indoors, making the space feel warm and inviting.
3. String Art Masterpieces
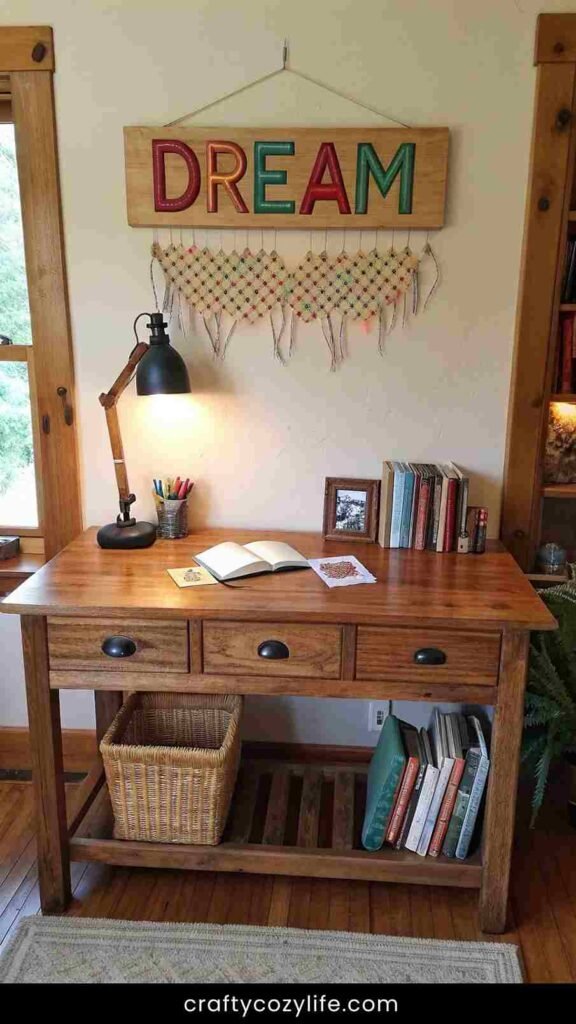
String art is a playful way to add dimension and texture to your walls. Bonus? It’s incredibly therapeutic to make.
Step-by-Step:
- Hammer nails into a wooden board in the shape of your design (hearts, stars, or words work great).
- Tie a piece of string to one nail and start weaving it around the others in random or patterned directions.
- Continue until your design is filled out, and tie off the string securely.
Picture This:
A rustic study corner with a wooden desk. Above it, your string art spells out “Dream” in bold, vibrant colors, inspiring you every day.
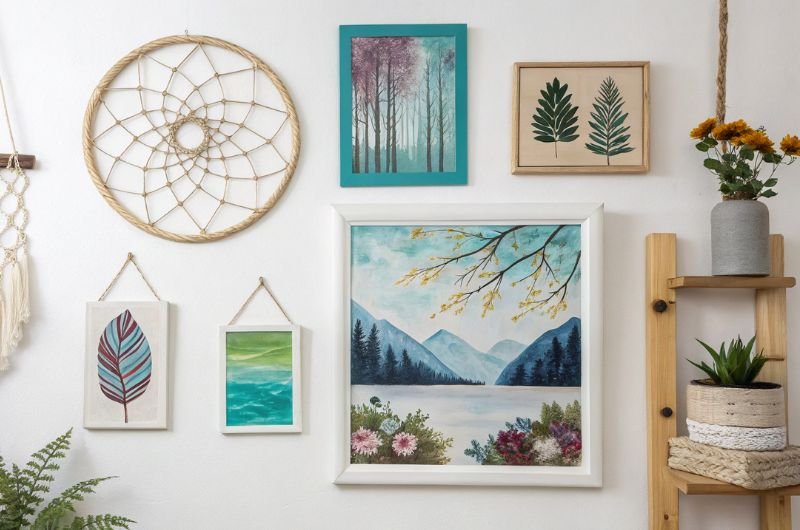
4. Gallery Wall with a Twist
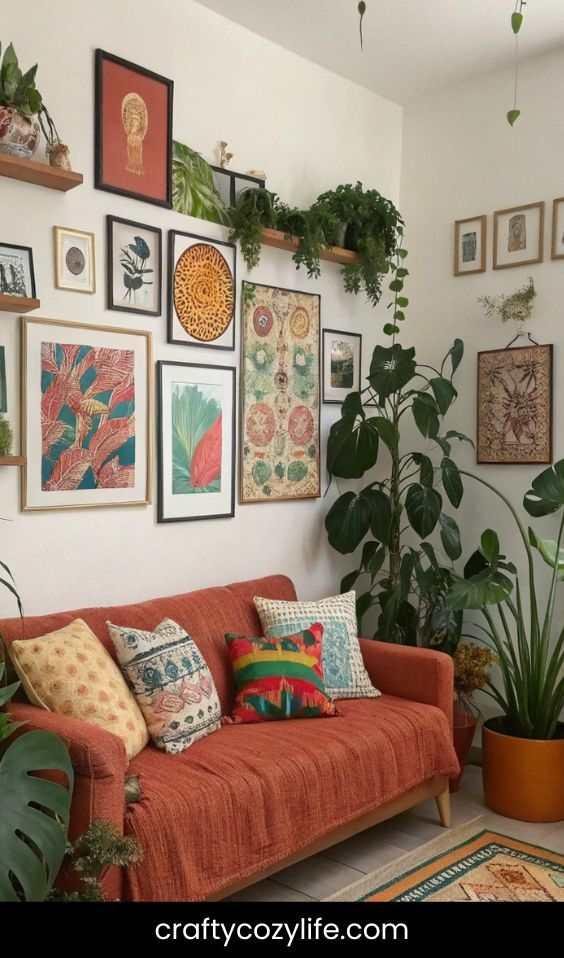
Create a gallery wall that’s all about you—mix photos, postcards, and small DIY frames.
Step-by-Step:
- Gather your favorite photos, small artworks, and memorabilia.
- Paint or decorate a mix of thrifted frames.
- Arrange them on the wall in a layout you love (pro tip: trace frames on paper first for a mock layout).
- Hang them up using nails or removable adhesive strips.
Picture This:
A boho-chic living room filled with plants. Your gallery wall, bursting with color and memories, adds a personal touch that ties the space together beautifully.
5. Tapestry and Fabric Wall Art
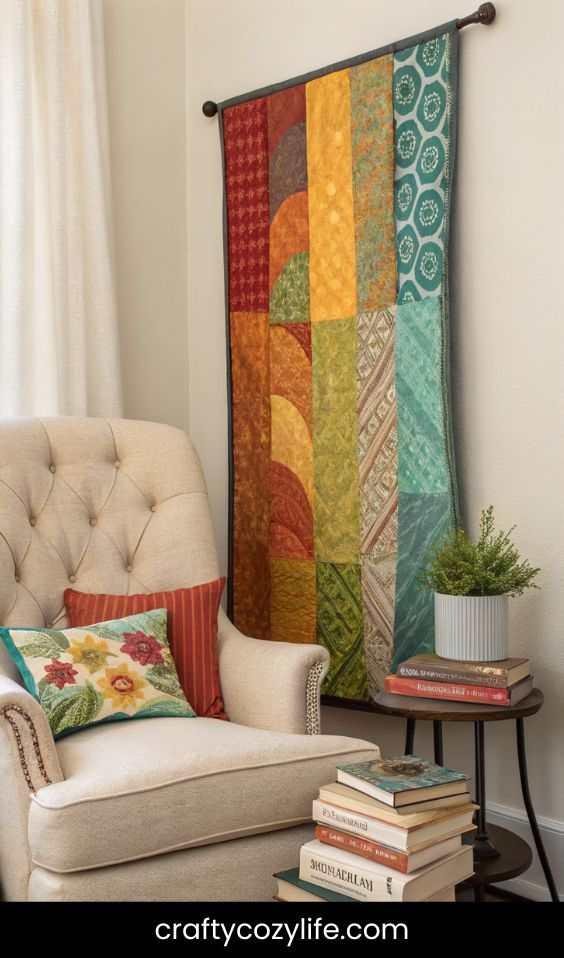
Have an old scarf or fabric lying around? Turn it into stunning wall decor.
Step-by-Step:
- Choose a fabric with patterns or colors that match your room’s vibe.
- Stretch the fabric over a wooden frame or embroidery hoop.
- Secure the fabric tightly using staples or hot glue.
- Hang it up for an instant pop of texture.
Picture This:
A serene reading nook with a comfy chair and a stack of books. Your fabric wall art, with its vibrant hues, creates a cozy corner you never want to leave.
6. Macramé Wall Hangings
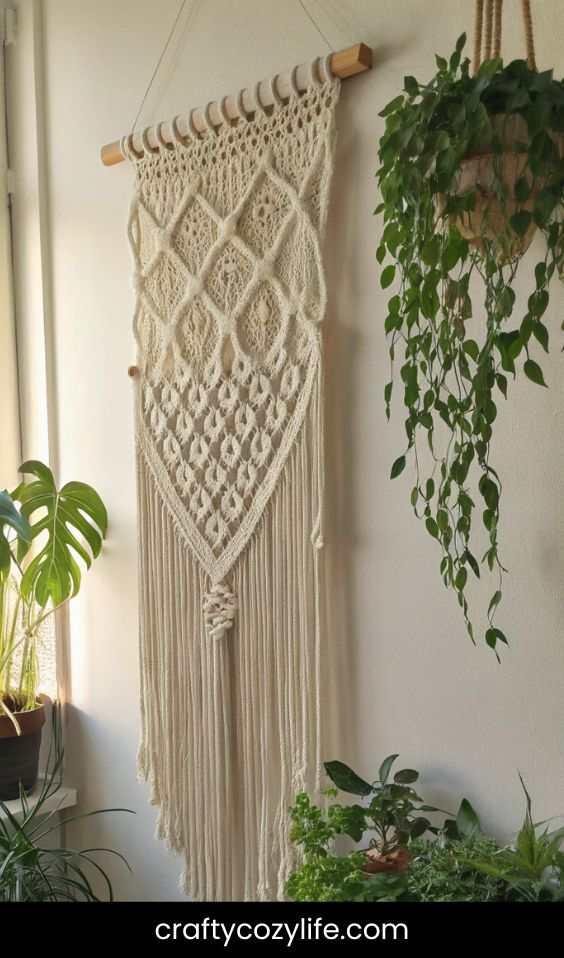
Channel your inner boho spirit with a macramé masterpiece.
Step-by-Step:
- Choose a sturdy wooden dowel or stick as the base.
- Cut equal lengths of macramé cord and tie them in patterns like square knots or spiral knots.
- Trim the ends for a neat finish or leave them frayed for a rustic vibe.
- Hang it up using string or hooks.
Picture This:
A sunny corner filled with plants, and your macramé wall hanging adds that dreamy, handmade touch to the space.
7. Paper Flower Wall Art
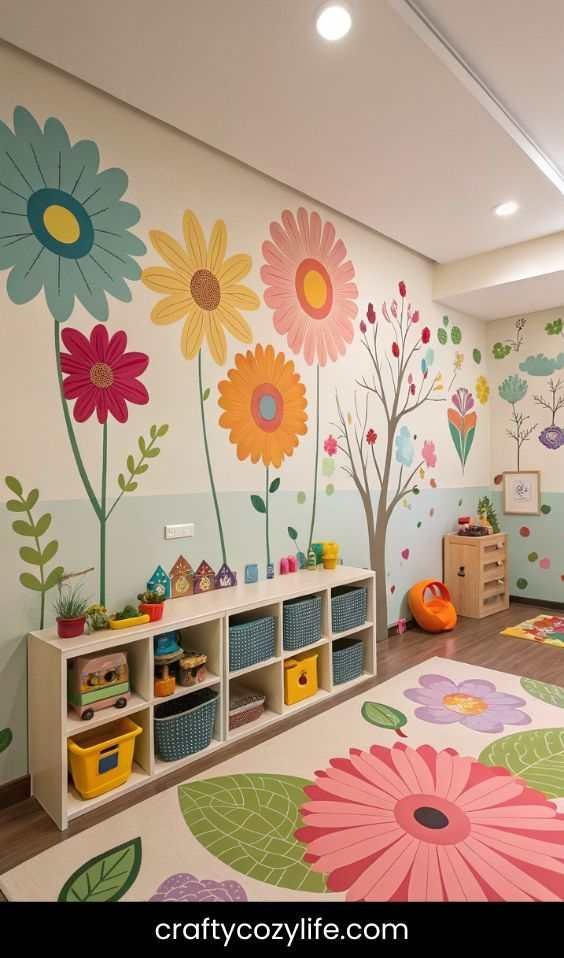
Brighten up any room with colorful, oversized paper flowers.
Step-by-Step:
- Use colored cardstock or craft paper to cut petal shapes in varying sizes.
- Layer and glue the petals together to form flowers.
- Attach the flowers to a wall or board with double-sided tape or hot glue.
Picture This:
A kid’s playroom with a wall of cheerful, oversized flowers—bright, fun, and impossible not to smile at.
8. Abstract Splatter Painting
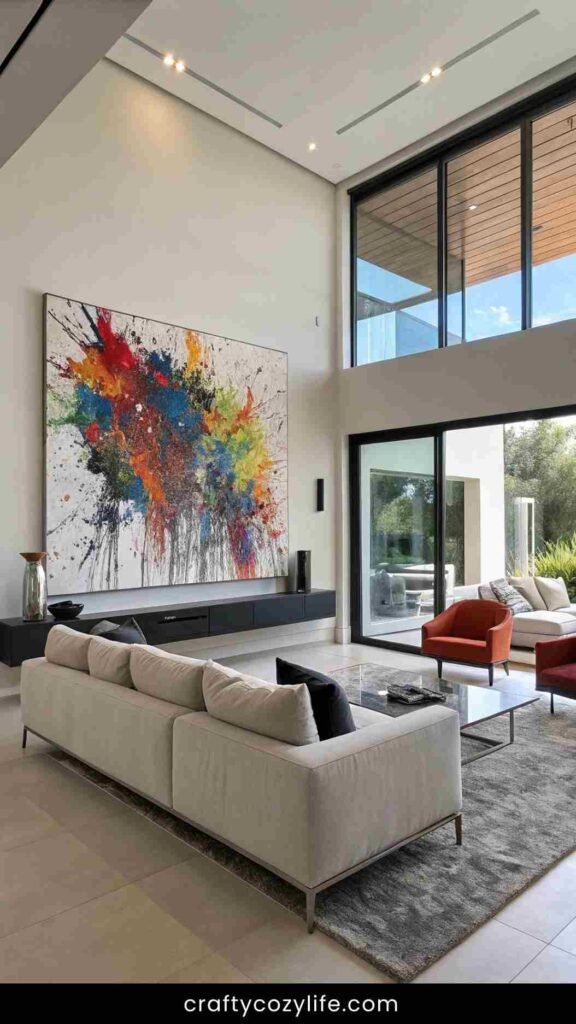
Let loose and create a Jackson Pollock-inspired splatter painting.
Step-by-Step:
- Lay a large canvas on a drop cloth (preferably outdoors).
- Use brushes or spoons to splatter paint onto the canvas.
- Layer different colors for a bold, abstract effect.
- Let it dry and hang it up for an artsy vibe.
Picture This:
A modern living room with sleek furniture and your bold, colorful splatter painting stealing all the attention.
9. Chalkboard Wall Art
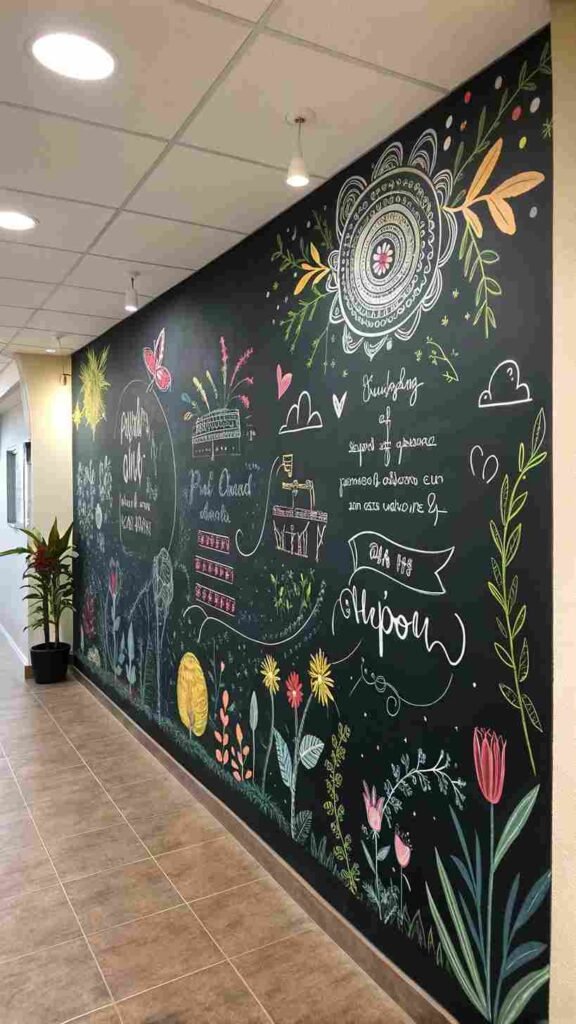
Add a fun and functional piece to your walls with chalkboard paint.
Step-by-Step:
- Paint a section of the wall or a wooden board with chalkboard paint.
- Let it dry completely, then season the surface with chalk.
- Use chalk to draw, write quotes, or create weekly menus.
Picture This:
A kitchen with a chalkboard art piece that doubles as a menu planner, complete with today’s “specials.”
10. Shadow Box Collages
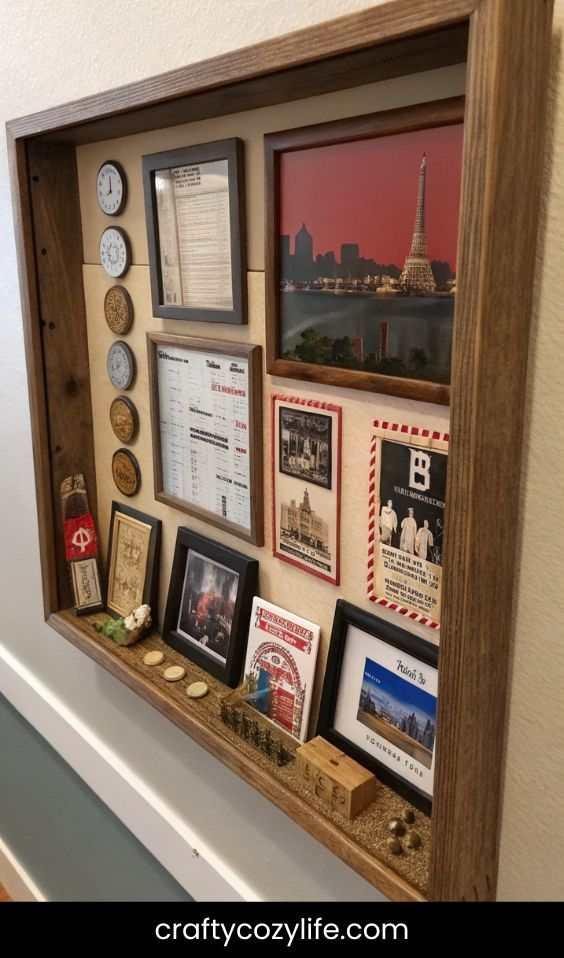
Turn mementos into art with shadow boxes.
Step-by-Step:
- Pick a shadow box frame and remove the back panel.
- Arrange your items (tickets, seashells, or small trinkets) inside.
- Secure them with glue or pins, then close the frame.
- Hang or display it for instant nostalgia.
Picture This:
A cozy hallway with a shadow box collage filled with seashells and photos from your last beach trip, capturing memories in style.
11. Painted Wooden Signs
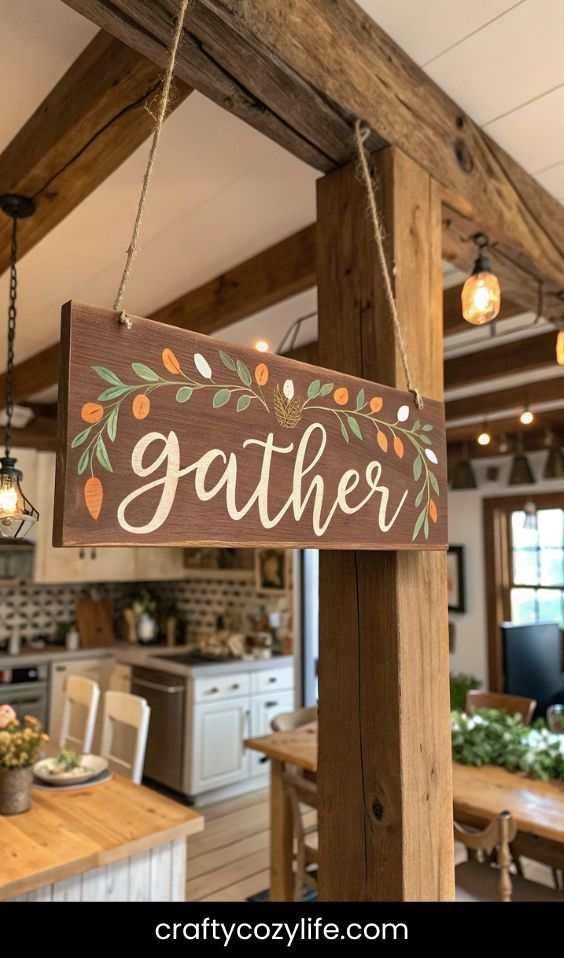
Create rustic, farmhouse-style wall decor with painted wood.
Step-by-Step:
- Sand a wooden board to smooth the surface.
- Paint it with your favorite quote, word, or design using stencils.
- Add a distressed finish with sandpaper for a vintage look.
- Mount it on the wall or lean it on a shelf.
Picture This:
A farmhouse kitchen with a wooden sign that reads “Gather” in warm, welcoming tones.
12. Photo Clip String Lights
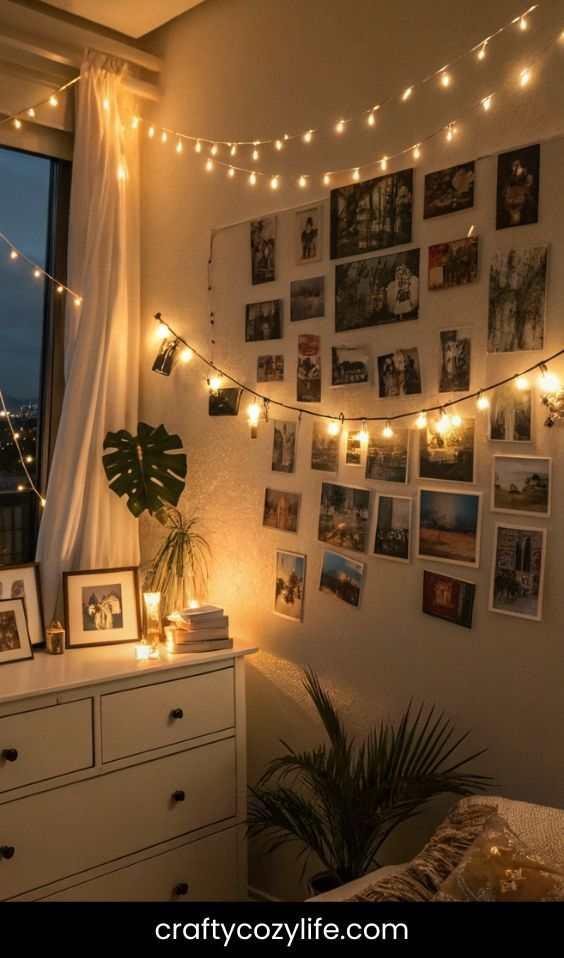
Combine photos and lighting for an enchanting wall feature.
Step-by-Step:
- Hang a string of fairy lights on the wall.
- Use mini clothespins to attach printed photos to the string.
- Turn on the lights for an instant cozy vibe.
Picture This:
A bedroom glowing softly at night, with cherished photos illuminated by twinkling string lights.
13. Fabric Panel Wall Art
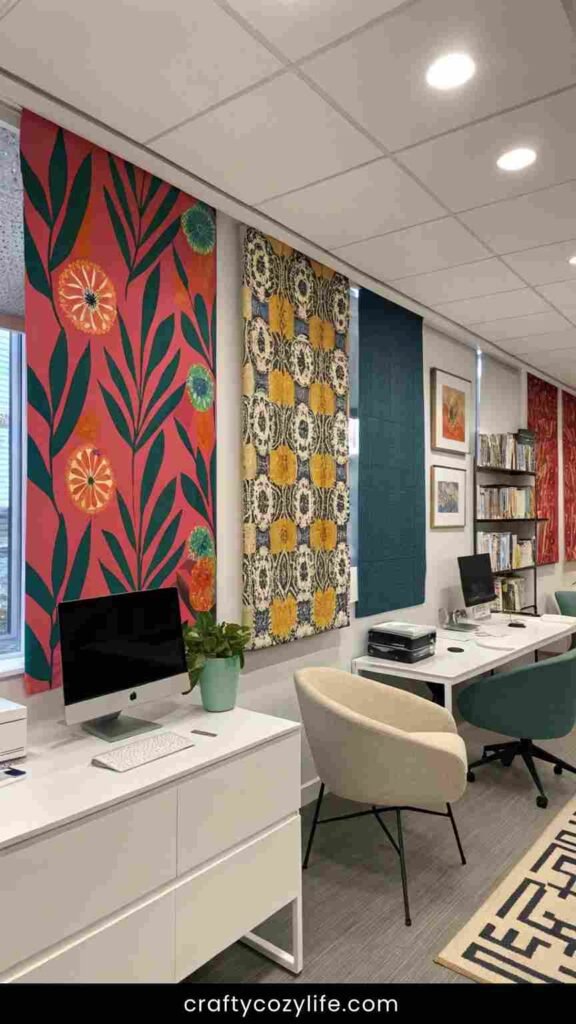
Use fabric panels for a colorful and textured art piece.
Step-by-Step:
- Wrap fabric around a foam board or stretched canvas.
- Secure it tightly with a staple gun or glue.
- Mix and match patterns for a gallery wall effect.
Picture This:
A chic office space with fabric panels in bold patterns, adding a fun pop of color to your work zone.
14. Mosaic Mirror Art
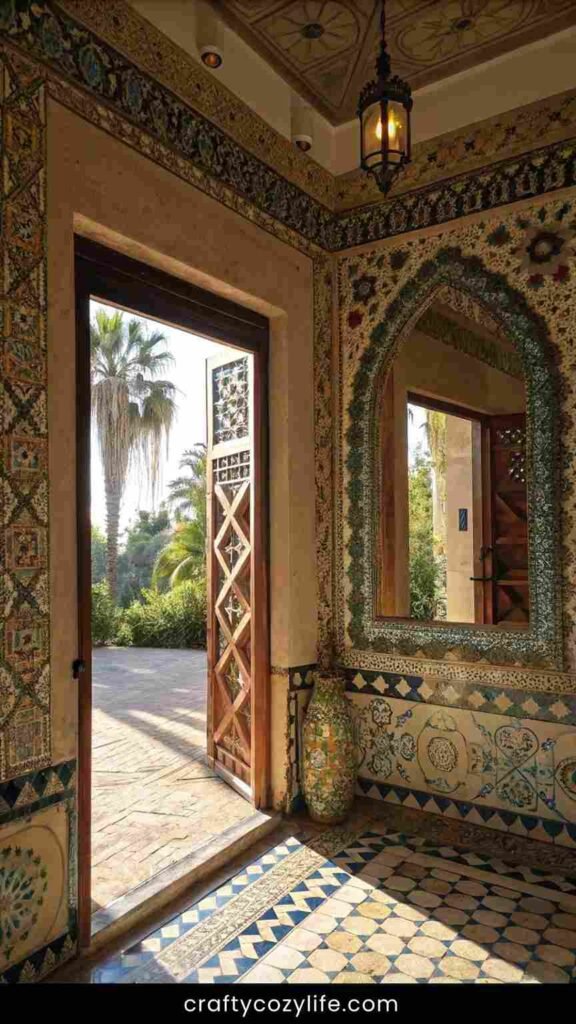
Turn an old mirror into a dazzling mosaic masterpiece.
Step-by-Step:
- Break tiles or mirrors into small pieces (safely, with gloves).
- Arrange the pieces around the mirror in a pattern or randomly.
- Use tile adhesive to stick them down, then fill the gaps with grout.
- Clean off excess grout and hang your mosaic mirror.
Picture This:
A sunlit entryway with a mosaic mirror reflecting light and making the space feel larger and brighter.
15. Floating Shelf Displays
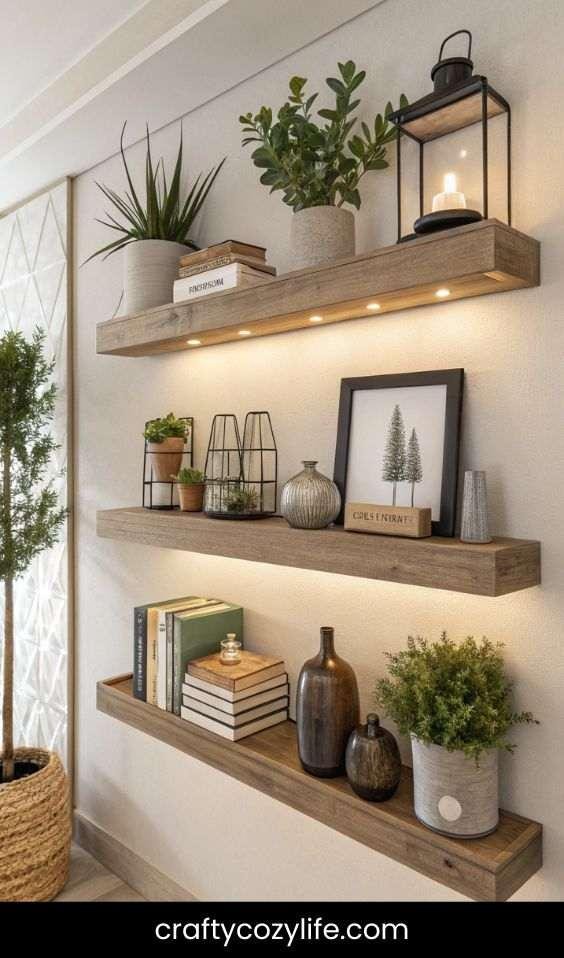
Turn everyday objects into a curated gallery on floating shelves.
Step-by-Step:
- Install floating shelves at varying heights.
- Arrange small plants, books, and art pieces on them.
- Swap items seasonally for a fresh look.
Picture This:
A cozy reading nook with floating shelves filled with books, plants, and a tiny DIY sculpture you made.
FAQs
Q: Do I need to be artistic to try DIY wall art?
A: Absolutely not! DIY wall art is all about expressing your creativity, no matter your skill level. Many ideas are beginner-friendly, and you can start simple with techniques like stenciling or string art.
Q: What’s the most budget-friendly DIY wall art idea?
A: Paper flower wall art, chalkboard paint designs, and minimalist canvas art are incredibly affordable options. You can use materials you already have at home or find cheap supplies at a dollar store or thrift shop.
Q: How do I choose the best wall art idea for my space?
A: Think about your room’s style and color palette. For a modern vibe, try minimalist or abstract art. For a cozy feel, pressed flower or fabric art works wonders. Let your room’s theme guide you.
Q: Can I use recycled or upcycled materials for DIY wall art?
A: Yes! Upcycling is a fantastic way to save money and be eco-friendly. Use old picture frames, scrap wood, or leftover fabric for unique, personalized art pieces.
Q: How do I hang my DIY wall art securely?
A: For lightweight pieces, removable adhesive strips are great. Heavier items like wooden signs or shadow boxes might require nails or wall anchors. Always check the weight capacity of your hanging tools.
Q: What if I mess up during a project?
A: No worries—DIY is all about experimenting! Many mistakes can be fixed or turned into happy accidents. For example, if your paint splatters go off course, you might just discover a new pattern!
Q: How long do these projects typically take?
A: It depends on the complexity. Simple projects like minimalist canvas art or string lights take about 1–2 hours. More intricate designs like mosaic mirrors or macramé can take a few days.
Q: What’s a good way to get inspired for DIY wall art?
A: Browse Pinterest, Instagram, or home decor blogs for ideas. You can also take inspiration from nature, your favorite colors, or even memories you want to celebrate.
Q: Can I involve kids in making DIY wall art?
A: Definitely! Projects like paper flowers, finger-painted canvases, or photo clip string lights are perfect for kids. Just supervise them with tools like scissors or glue.
Q: How can I make my DIY wall art look more professional?
A: Pay attention to details like symmetry, clean lines, and color balance. Use quality materials and take your time with each step. A little patience goes a long way!
Closing Thoughts
DIY wall art is more than just decoration—it’s a reflection of your personality and creativity. Whether you’re adding a minimalist touch or creating a gallery of memories, these ideas are here to inspire and guide you. So, grab your supplies, put on your favorite playlist, and let the magic happen.
Now it’s your turn: Which of these DIY wall art ideas will you try first?